Building self-contained, single executable .NET Core 3 CLI tools
TL; DR: This is the .NET Core’s first iteration at self-contained binaries. It is not ideal - the resulting size of ~40M is probably way too large for simple applications. But the fact that now we can actually create a global tool with .NET and distribute it without requiring users to install .NET is extremely exciting! Not to mention the ease of packaging applications in containers, and not having to copy tens of files.
I recently watched Carolyn Van Slyck’s excellent GopherCon talk about building command-line tools that people love to use - and while the examples are tailored for the Go programming language, the learnings presented here are applicable to any language or framework you are using to build command-line interfaces (and you can find the slides for the talk here.) If you are working on, or thinking about building CLIs, drop what you’re doing and watch Carolyn’s talk!
But why build a CLI with .NET Core and not Go, or Rust? If you’re building your tool in a framework and language you’re happy with, there’s absolutely no reason to change it. But if you are already invested in the .NET ecosystem, you could take advantage of it and build your project with the toolchain and ecosystem you are familiar with.
In the following sections, we’ll explore different aspects of building a CLI, such as configuration, dependency injection, or packaging. The article is written for .NET Core 3 preview 8 - and while the actual package versions are specific to preview 8, in theory there should not be any major breaking changes until the final release.
Configuration
When you create a new console application with dotnet new console, it comes with no dependencies. So if you want to use configuration providers, you have to add the correct NuGet packages. The great part about building your CLI with .NET Core is that you can reuse any configuration provider available with ASP .NET Core (and there are quite a few) - you can explore all of them on the official documentation.
Configuration providers read configuration data into key-value pairs from a variety of configuration sources.
There official packages to automatically read configuration from any of the following sources:
- JSON
- XML
- INI
- command line arguments
- environment variables
- Azure services (Key Vault, App Service Configuration)
Additionally, you can find community packages for other configuration providers, such as reading from a YAML file, or from a TOML file (although keep in mind that the TOML configuration provider needs a new release to use it, as of the time of writing this article.)
So how can we add the configuration providers to our application? First step is to add the desired NuGet packages to your application project - for example, for JSON and YAML, this is what packages you might use (keep in mind that the current versions of the packages might differ, as the article is written with .NET Core 3 preview 8):
<PackageReference Include="Microsoft.Extensions.Configuration" Version="3.0.0-X" />
<PackageReference Include="Microsoft.Extensions.Configuration.Json" Version="3.0.0-X" />
<PackageReference Include="NetEscapades.Configuration.Yaml" Version="1.5.0" />
Then, we add our configuration files - example for YAML (you can add similar files / configuration sources for all providers you want to use - keep in mind that configuration sources are read in order, and the first found will be the configuration source used):
Note that I’m totally ripping off Carolyn’s example here.
emoticons:
  shrug: '¯\_(ツ)_/¯'
  tableflip: "(╯°□°)╯︵ ┻━┻"
So how would we consume this configuration?
var config = new ConfigurationBuilder()
    .SetBasePath(Directory.GetCurrentDirectory())
    .AddYamlFile("appsettings.yaml", true, true)
    .AddJsonFile("appsettings.json", true, true)
    .Build();

var emoticons = config.GetSection("emoticons")
    .GetChildren()
    .ToDictionary(x => x.Key, x => x.Value);
Here we’re passing the emoticons configuration into a Dictionary<string, string>. If you want to automatically bind your configuration to strongly-typed objects, you can use Binder package:
<PackageReference Include="Microsoft.Extensions.Configuration.Binder" Version="3.0.0-X" />
Then, for this sample YAML configuration:
person:
  name: Jane
  profession: scientist
You can automatically bind it to a strongly-typed object:
var p = new Person();
config.GetSection("person").Bind(p);

class Person
{
    public string Name { get; set; }
    public string Profession { get; set; }
}
For custom keys, you can use the [JsonObject("custom_object")] and [JsonProperty("custom_property")] attributes for JSON, and for YAML:
[YamlMember(Alias = "custom_member", ApplyNamingConventions = false)]
Generally, you could create a top level YourAppConfiguration class that holds all of your configuration and bind to that.
Parsing command line arguments and flags
If you are not interested in how to use the
System.CommandLinelibrary to parse command line arguments, feel free to skip to the next section.
There are multiple packages for parsing command line arguments:
- github.com/commandlineparser/commandline
- github.com/natemcmaster/CommandLineUtils - this is a fork of
Microsoft.Extensions.CommandLineUtils, which became unmaintained - dotnet/command-line-api - the “new”
System.CommandLine- keep in mind the package is still experimental
Regardless of the actual package you use to parse arguments, the core concepts are the same - you have a root command, subcommands, arguments, flags, and for the rest of this article we will use System.CommandLine:
<PackageReference Include="System.CommandLine.Experimental" Version="0.3.0-alpha.19405.1" />
So let’s add a command to show an emoticon from the configuration file:
public class ShowCommandHandler
{
    public Command Create()
    {
        var cmd = new Command("show", "shows an emoticon from the configuration given its name");

        cmd.AddArgument(new Argument<string>("emoticon"));
        cmd.AddOption(new Option(new string[] { "--verbose", "-v" }, "if provided, it will also print the name of the emoticon")
        {
            Argument = new Argument<bool>(() => false)
        });

        cmd.Handler = CommandHandler.Create<string, bool>((string emoticon, bool verbose) =>
        {
            // do something with the given arguments and flags and with the emoticon dictionary from main
        });
        return cmd;
    }
}
Parameters are matched using a naming convention that converts camel-cased parameters to kebab-cased options. For example, the option --an-int matches parameter anInt on the handler method. In our case, both the argument “emoticon” and the flag “verbose” are directly passed to the emoticon and verbose variables on the handler.
Then, back in our main method, we create a new instance of ShowCommandHandler and add it as a subcommand:
var cmd = new CommandLineBuilder()
                .AddCommand(new ShowCommandHandler().Create())
                .UseDefaults()
                .Build();

return cmd.Invoke(args);
Let’s run our tool:
$ dotnet run show shrug --verbose
shrug: ¯\_(ツ)_/¯
Separating the implementation from the CLI handlers
Ideally, we don’t want to build our whole application logic in the CLI handlers - for our application to be testable, and potentially reusable in a package by other projects. In our case, the application logic consists of retrieving emoticons from some source. It might be .NET configuration, or any source that has a configuration provider, but it can also be a remote source - so our retriever would make some HTTP requests in order to get our emoticon. We don’t know all the possible ways of extending our application yet - so let’s start by creating a very simple interface:
public interface IEmoticonRetriever
{
    IEnumerable<Emoticon> List();
    Emoticon Get(string name);
}
Now, for any new source of emoticons, we can implement this interface - for example, continuing to use our configuration retriever:
public class ConfigEmoticonRetriever : IEmoticonRetriever
{
    private List<Emoticon> _emoticons;
    public ConfigEmoticonRetriever(IConfigurationRoot cfg)
    {
        _emoticons = new List<Emoticon>();
        var dict = cfg.GetSection("emoticons").GetChildren().ToDictionary(x => x.Key, x => x.Value);
        foreach (KeyValuePair<string, string> entry in dict)
        {
            _emoticons.Add(new Emoticon(entry.Key, entry.Value));
        }
    }
    public Emoticon Get(string name)
    {
        return _emoticons.FirstOrDefault(e => e.Name == name);
    }

    public IEnumerable<Emoticon> List()
    {
        return _emoticons;
    }
}
Now we can change our handlers to use an IEmoticonRetriever. At this point though, we also need to start instantiating things and pass concrete implementations around.
Potentially, command handlers would need to instantiate a ConfigEmoticonRetriever object, and also pass an IConfigurationRoot object - and we don’t want to do this - the main reason we wanted to split the emoticon retrieval logic out of the CLI handlers was to separate the concerns of the project - the CLI is only used to handle interactions from the user.
We could add the emoticon retrieval object to the constructor:
private IEmoticonRetriever _emoticons { get; set; }
public ShowCommandHandler(IEmoticonRetriever emoticons)
{
    _emoticons = emoticons;
}
This shifts the issue of creating the instance of the emoticon retrieval object up in the main method - here we have two options - actually create a new instance of it, and pass the configuration object we already have, or use dependency injection.
Dependency injection
You can read about dependency injection in ASP .NET Core 3 on the official documentation - however, the documentation is tailored for web applications.
Adding dependency injection to an application of this size is probably an overreaction. That being said, as the application grows, and the actual application logic grows, manually instantiating objects and keeping track of their lifetime across multiple namespaces can be difficult.
Let’s recap what objects we’re trying to use here, how we are using them, and what is the relationship between them:
- the
Mainmethod - a root command in the
Mainmethod - the root command creates new CLI handlers
- CLI handlers contain an
IEmoticonRetrievalobject - our current implementation of
IEmoticonRetrievalcontains anIConfigurationRootobject
First step is to add the dependency injection package:
<PackageReference Include="Microsoft.Extensions.DependencyInjection" Version="3.0.0-X" />
Now we can create a service provider - an object that provides concrete implementations for our services, based on the configured service collection:
var serviceCollection = new ServiceCollection().AddTransient<IEmoticonRetriever, ConfigEmoticonRetriever>();
serviceCollection.Add(new ServiceDescriptor(serviceType: typeof(IConfigurationRoot), instance: config));
var serviceProvider = serviceCollection.BuildServiceProvider();
var emoticons = serviceProvider.GetService<IEmoticonRetriever>();

var cmd = new CommandLineBuilder()
    .AddCommand(new ListCommandHandler(emoticons).Create())
    .AddCommand(new ShowCommandHandler(emoticons).Create())
    .UseDefaults()
    .Build();
Let’s break this down line by line:
- first, we create a new service collection and add our
IEmoticonRetrievalinterface with the concrete implementation ofConfigEmoticonRetriever- in natural language, this line can be translated into: “whenever someone asks in their constructor for anIEmoticonRetrieval, give them a new instance ofConfigEmoticonRetriever”. You can play around with the actual lifetime of services (changing from transient to singleton, and I recommend you read further about lifetimes in the documentation). - next, we add the configuration object to the service collection - in natural language, this line can be translated into: “whenever someone asks in their constructor for an
IConfigurationRoot, give them the object from the variableconfig”. - next we build the service provider based on the collection we configured so far, then we retrieve an instance of an
IEmoticonRetrievalso we use it in our CLI handlers. - now we’re back to our CLI, wiring up the handlers - and passing the instance of the emoticon retrieval we got from the service provider.
Now we have dependency injection.
Splitting the application logic from the CLI handlers also allows us to easily add testing - and have absolutely no connection between what library we used for command line parsing and testing - at this point, you can apply your preferred testing patterns to this CLI project.
Finally, if you want to include any UI element in your console application, you should really have a look at gui.cs - it’s an incredible package that allows you to create menus, buttons, checkboxes, or progress bars, all within a terminal console.
Publishing as single binary
According to the release notes of .NET Core 3 Preview 5, this form of single EXE is effectively a self-extracting executable. It contains all dependencies, including native dependencies, as resources. At startup, it copies all dependencies to a temp directory, and loads them for there. It only needs to unpack dependencies once. After that, startup is fast, without any penalty.
Because the binary will contain all native dependencies, it needs the runtime identifier - in my case linux-x64 (you can find all runtime identifiers in the official documentation for .NET Core). Additionally, we also add the property to trim the resulting binary, reducing the size by analyzing IL and removing unused assemblies.
Note that you should always test the application after trimming, and using features such as reflection might not work with trimming.
<PropertyGroup>
  <RuntimeIdentifier>linux-x64</RuntimeIdentifier>
  <PublishSingleFile>true</PublishSingleFile>
  <PublishTrimmed>true</PublishTrimmed>
</PropertyGroup>
Let’s publish our application in release configuration - dotnet publish -c Release - this will create our binary in bin/Release/linux-x64/publish - let’s copy it in the same directory as our configuration files and explore it further:
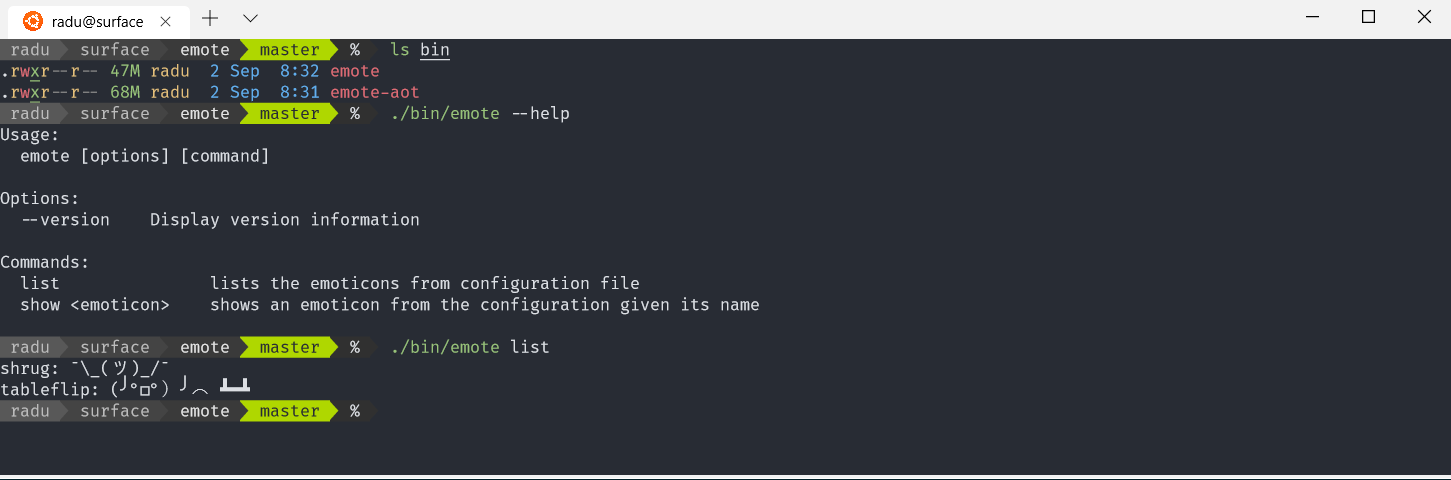
$ ls emote
.rwxr--r-- 47M radu  2 Sep  8:32 emote
Our resulting application is 47M - not a small application, for what we’ve accomplished (and especially compared with a Go or Rust application, which would have been maybe 3 times smaller) - BUT - the binary contains the entire .NET Core runtime - and is self-contained. At least now you have the option to make the tradeoff between development ease, ecosystem, tooling, and resulting application size.
Additionally, more work is expected to happen in the future to make the resulting binary even smaller.
$ emote show --help
show:
  shows an emoticon from the configuration given its name

Usage:
  emote show [options] <emoticon>

Arguments:
  <emoticon>

Options:
  -v, --verbose    if provided, it will also print the name of the emoticon

$ emote show shrug
¯\_(ツ)_/¯
Also note the auto-generated help text.
Startup time and AOT compilation
Let’s check the execution time of our tool:
$ time emote --version
1.0.0
emote --version  0.26s user 0.01s
On average, the execution time for this tool is just around 0.26 seconds (your timing might differ based on a wide number of factors) - let’s compare that to the execution time of a Go based, much more complex program - Helm 3:
$ time helm version
version.BuildInfo{Version:"v3.0.0-beta.2", GitCommit:"26c7338408f8db593f93cd7c963ad56f67f662d4", GitTreeState:"clean", GoVersion:"go1.12.9"}
helm version  0.13s user 0.03s
Our application is twice as slow as Helm, a Go-based tool, and all of the extra time is because of the slow startup.
(Interestingly enough, because of the Kubernetes client-go, binaries that use it are around 40M as well, so from the size perspective, there isn’t much difference).
But .NET Core 3 comes with more option - according to the release notes, you can improve the startup time of your .NET Core application by compiling your application assemblies as ReadyToRun (R2R) format. R2R is a form of ahead-of-time (AOT) compilation. R2R binaries improve startup performance by reducing the amount of work the just-in-time (JIT) compiler needs to do as your application loads. The binaries contain similar native code compared to what the JIT would produce. However, R2R binaries are larger because they contain both intermediate language (IL) code, which is still needed for some scenarios, and the native version of the same code. R2R is only available when you publish a self-contained app that targets specific runtime environments (RID) such as Linux x64 or Windows x64.
Adding the setting in our project file:
<PublishReadyToRun>true</PublishReadyToRun>
And creating a new release, we see the size increase to 68M:
$ ls emote-aot
 .rwxr--r-- 68M radu  2 Sep  8:31 emote-aot
Let’s see what improvement this gets is with the startup time:
time emote-aot --version
1.0.0
emote-aot --version  0.13s user 0.03s
The startup performance is drastically improved - however, at the cost of increasing the binary size.
Conclusion
In this article we explored how to use .NET Core 3 to build command line interfaces, and use familiar techniques from .NET Core, such as configuration providers, or dependency injection. We also explored how to parse command line arguments and structure such a project, and in the end investigated how .NET Core 3 publishes a single executable binary for our tool, size, performance, and tradeoffs between size and startup time.
This is the .NET Core’s first iteration at self-contained binaries. It is not ideal - the resulting size of ~40M is probably way too large for simple applications (even when accepting the tradeoff for a slower startup time). But the fact that now we can actually create a global tool with .NET and distribute it without requiring users to install .NET is extremely exciting! Not to mention the ease of packaging applications in containers, and not having to copy tens of files, and ultimately this gives us the opportunity to choose.
Hopefully, future versions will have even smaller resulting binaries, with better startup time (and hopefully, more and more of the goodness in the CoreRT repository will be integrated into .NET Core).
You can find the final application we built on GitHub.
Thanks for reading :)