The Hybrid Cluster: A CI/CD Story [Part 1] - Configuring a hybrid swarm mode cluster in Azure with acs-engine
Now, you can create yourself a hybrid cluster within any private network where you have a Windows Server 2016 with Containers and a Linux machine - it can be locally, with VirtualBox, Hyper-V or VMWare, or it can be on your cloud provider of choice. The simplicity of Docker Swarm allows us to easily create a swarm within minutes of having our VMs deployed.
Here is a list of resources you might want to get started with before diving into this article:
- Getting started with Swarm Mode and Linux Containers - Docker docs
- Getting started with Swarm Mode and Windows Containers - Microsoft docs
- Initializing a Linux+Windows mixed-os cluster - Microsoft docs
How is this article different compared to the docs above?
In this article we will focus on deploying the cluster on Azure programmatically, using acs-engine, a tool that generates ARM (Azure Resource Manager) templates for Docker enabled clusters on Microsoft Azure. It will also deploy all resources necessary for our cluster, like load balancers, configure DNS for masters and agents and scale sets for agents and masters. More on this later.
While you can find more information about acs-engine on the GitHub repo, in short, the tool takes a cluster definition file and outputs ARM templates that can be deployed using the various Azure command-line interfaces like Azure CLI 2.0 or Azure PowerShell.
Getting started - prerequisites
This article will continue under the assumption that you have an active Azure subscription. If you don’t, there are various ways to get a free subscription, like Visual Studio Dev Essentials (see this link on how to activate your free monthly $25), or a free trial.
Before you get started, there is a great talk by Docker Developer Advocate and Microsoft MVP Elton Stoneman titled: The Hybrid Swarm: Running Windows and Linux Apps in one Docker Cluster where he talks about the concepts involved in having a hybrid swarm cluster and that I highly recommend.
Understanding all types of containers
First, there are Linux containers. They have been around for a while now (no, Docker did not invent them) and Docker created awesome tooling and integrations.
Linux containers use the host kernel to run “containerized” workloads - that is execute the process inside the container using Linux kernel features like cgroups and namespaces. Of course, to run Linux containers you need a Linux kernel - this hasn’t changed and will not change any time soon.
When we talk about the Windows ecosystem, we have Windows Server Containers and Hyper-V Containers.
Windows Server Containers, much like Linux containers, share the kernel with the host and other containers. “These containers do not provide a hostile security boundary and should not be used to isolate untrusted code.” (source - Microsoft docs)
Hyper-V Containers - “expands on the isolation provided by Windows Server Containers by running each container in a highly optimized virtual machine. In this configuration, the kernel of the container host is not shared with other containers on the same host. These containers are designed for hostile multitenant hosting with the same security assurances of a virtual machine. Since these containers do not share the kernel with the host or other containers on the host, they can run kernels with different versions and configurations.” (source - Microsoft docs)
However, there’s a twist: announced at DockerCon 2017, you will be able to run Linux containers on Windows hosts using Hyper-V Isolation
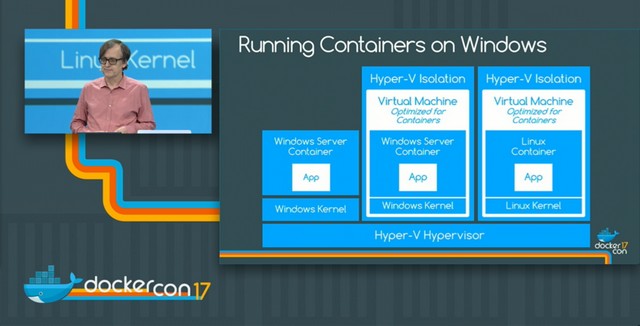
This is all possible through the new LinuxKit project, but more on this on a separate article in the future.
After we deploy our cluster, we will be able to deploy all types of containers described above.
The acs-engine cluster definition
As said earlier, we will use a JSON cluster definition file to, well, define our cluster.
This is a pretty standard cluster definition file for acs-engine, except for the addition of windowspool, a pool of Windows Server agents in our cluster.
You can find in-depth documentation for the cluster definition on the acs-engine GitHub repo here.
From the definition file, we see that we have a Swarm Mode cluster, with 3 Linux masters, 3 Linux agents and 3 Windows Server 2016 agents. Before we can use this definition file, we need to add the required values for dnxPrefix for the masters, Linux and Windows agents.
You must also provide a username and public SSH key for the Linux VMs and a username and password for the Windows VMs, and you can change the default number of 3 for the agent and master count.
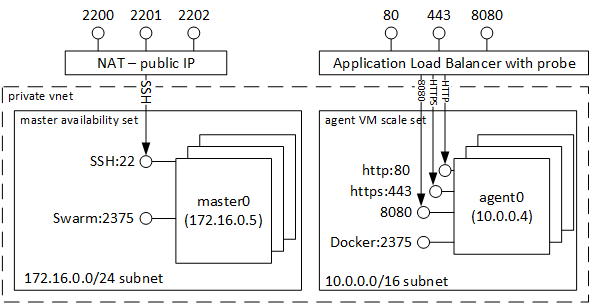
Compared to the image above, there is an additional VM Scale Set with the Windows agents. All VMs are in the same VNET, with the masters on a private subnet. All VMs are fully accessible to each other.
Deploying the cluster to Azure
So far we only have a cluster definition (with values for FQDN, usernames and passwords). Before we can actually deploy, we need to generate the ARM templates using acs-engine.
In order to do this, we will use the acs-engine tool. After we have the ARM template, we will use the az CLI to deploy them. You could install these either locally, or within containers, but the easiest way to do it is to use the Azure Cloud Shell.
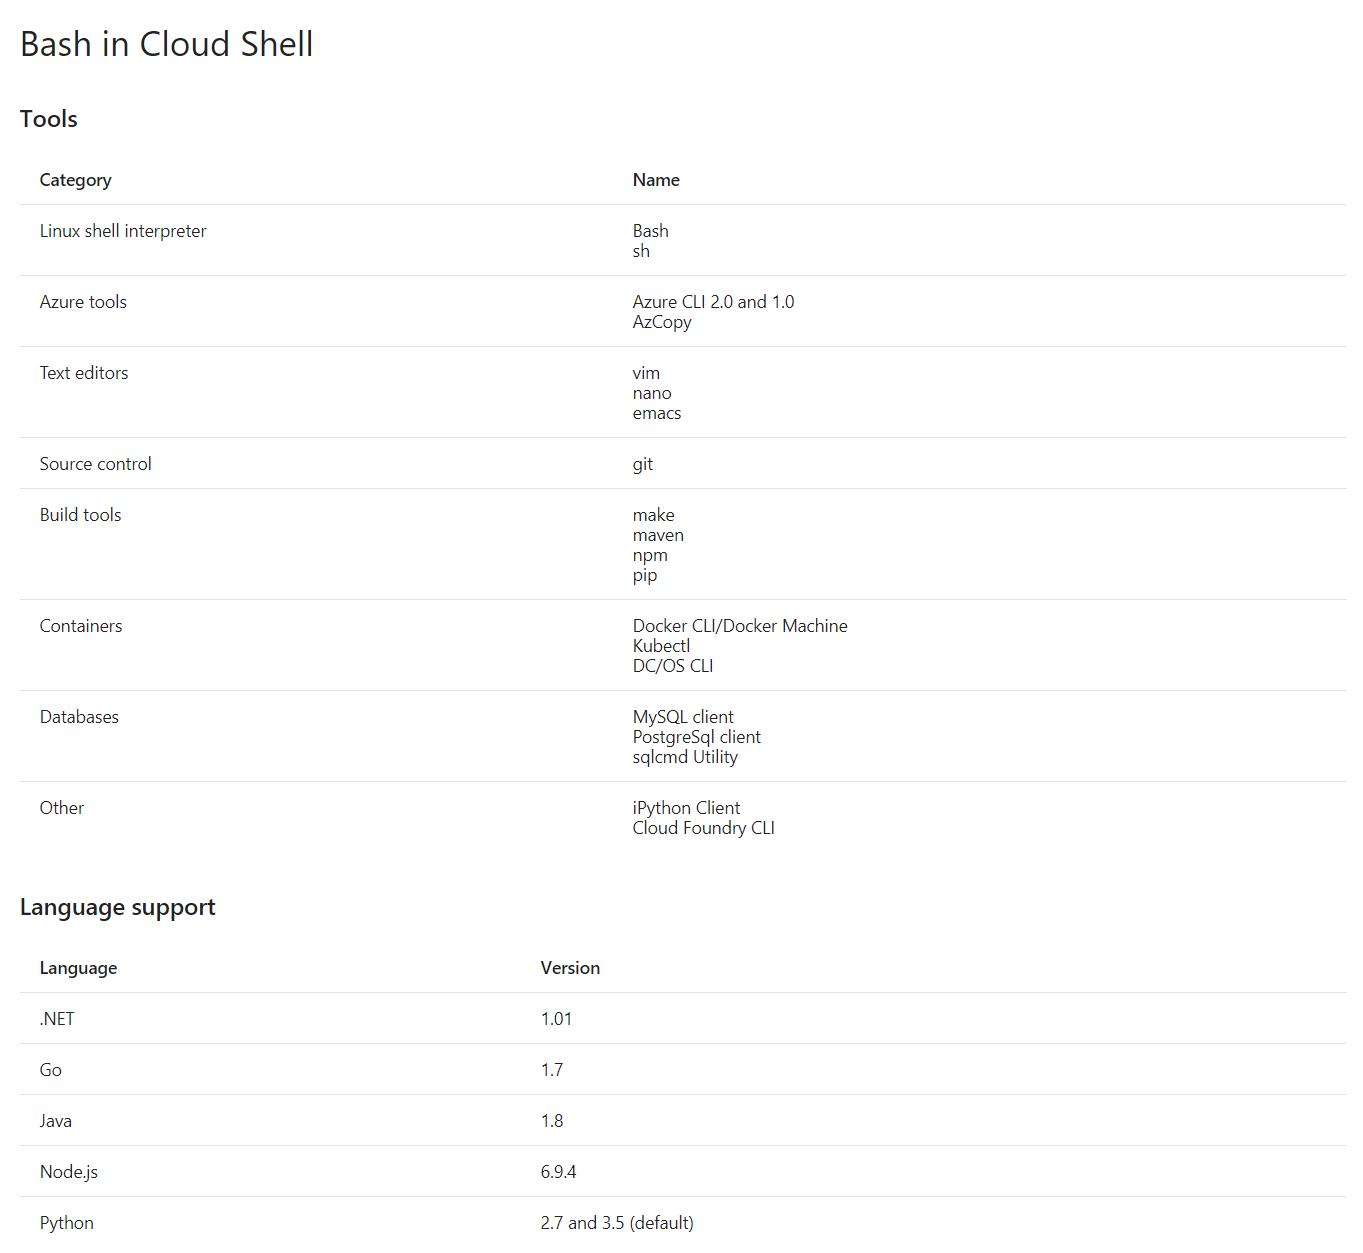
List of tools and languages supported in the Azure Cloud Shell
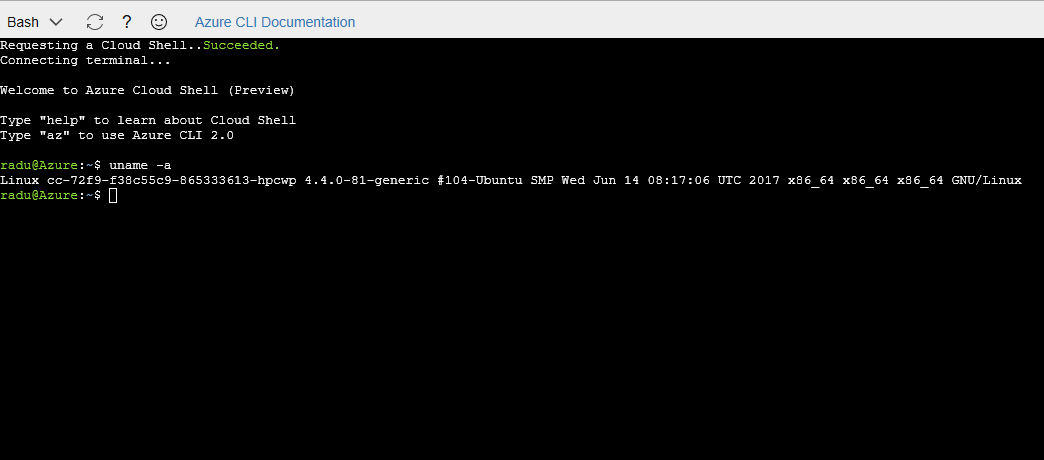
Log into portal.azure.com and request a cloud shell. You should see something like this:
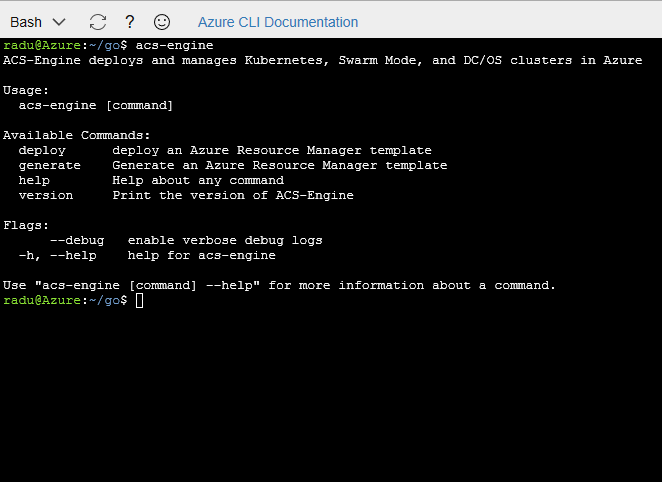
Now we should follow the instructions in the acs-engine documentation and install acs-engine in the Azure Cloud Shell.
First, we need to create a new directory called go and set it as GOPATH: mkdir go and export GOPATH=/home/{yourusername}/go.
Then, we need to download the package for acs-engine: go get github.com/Azure/acs-engine, then navigate to the source of the package and build it: go build.
Then, we add the bin folder from the go directory in the path:
export PATH=$PATH:/home/{yourusername}/go/bin
Now you should be able to execute acs-engine from any directory:
Now let’s create the ARM templates we will deploy: in a new directory, download the gist with the initial cluster definition (the gist file from above). You can either copy it yourself, or wget the file:
wget https://gist.githubusercontent.com/radu-matei/f610287201e4c08eb2e69eb5ebd02b2f/raw/d6a30f867b09d4baa64f78d2499a154096d053e2/swarmmode-hybrid.json
After you edit the file with your values, generate the ARM templates using acs-engine generate swarmmode-hybrid.json:
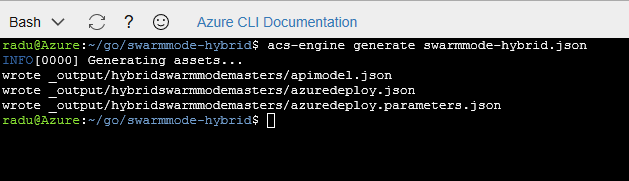
This will create an _output directory that will contain the ARM template tht we will use for the deployment.
First of all, we will create a new resource group: az group create --location westeurope --name your-resourcegroup-name
Note that you should choose the region closest to your location.
Then, using the generated files azuredeploy.json and azuredeploy.parameters.json, create a new deployment using the az command-line interface:
az group deployment create
    --name hybrid-swarmmode-deployment
    --resource-group {your-resource-group}
    --template-file azuredeploy.json
    --parameters azuredeploy.parameters.json
Note that you can also use a local installation of
az, or in a container, or any method of deploying ARM templates.
After the deployment started, here is how the resource group should look like:
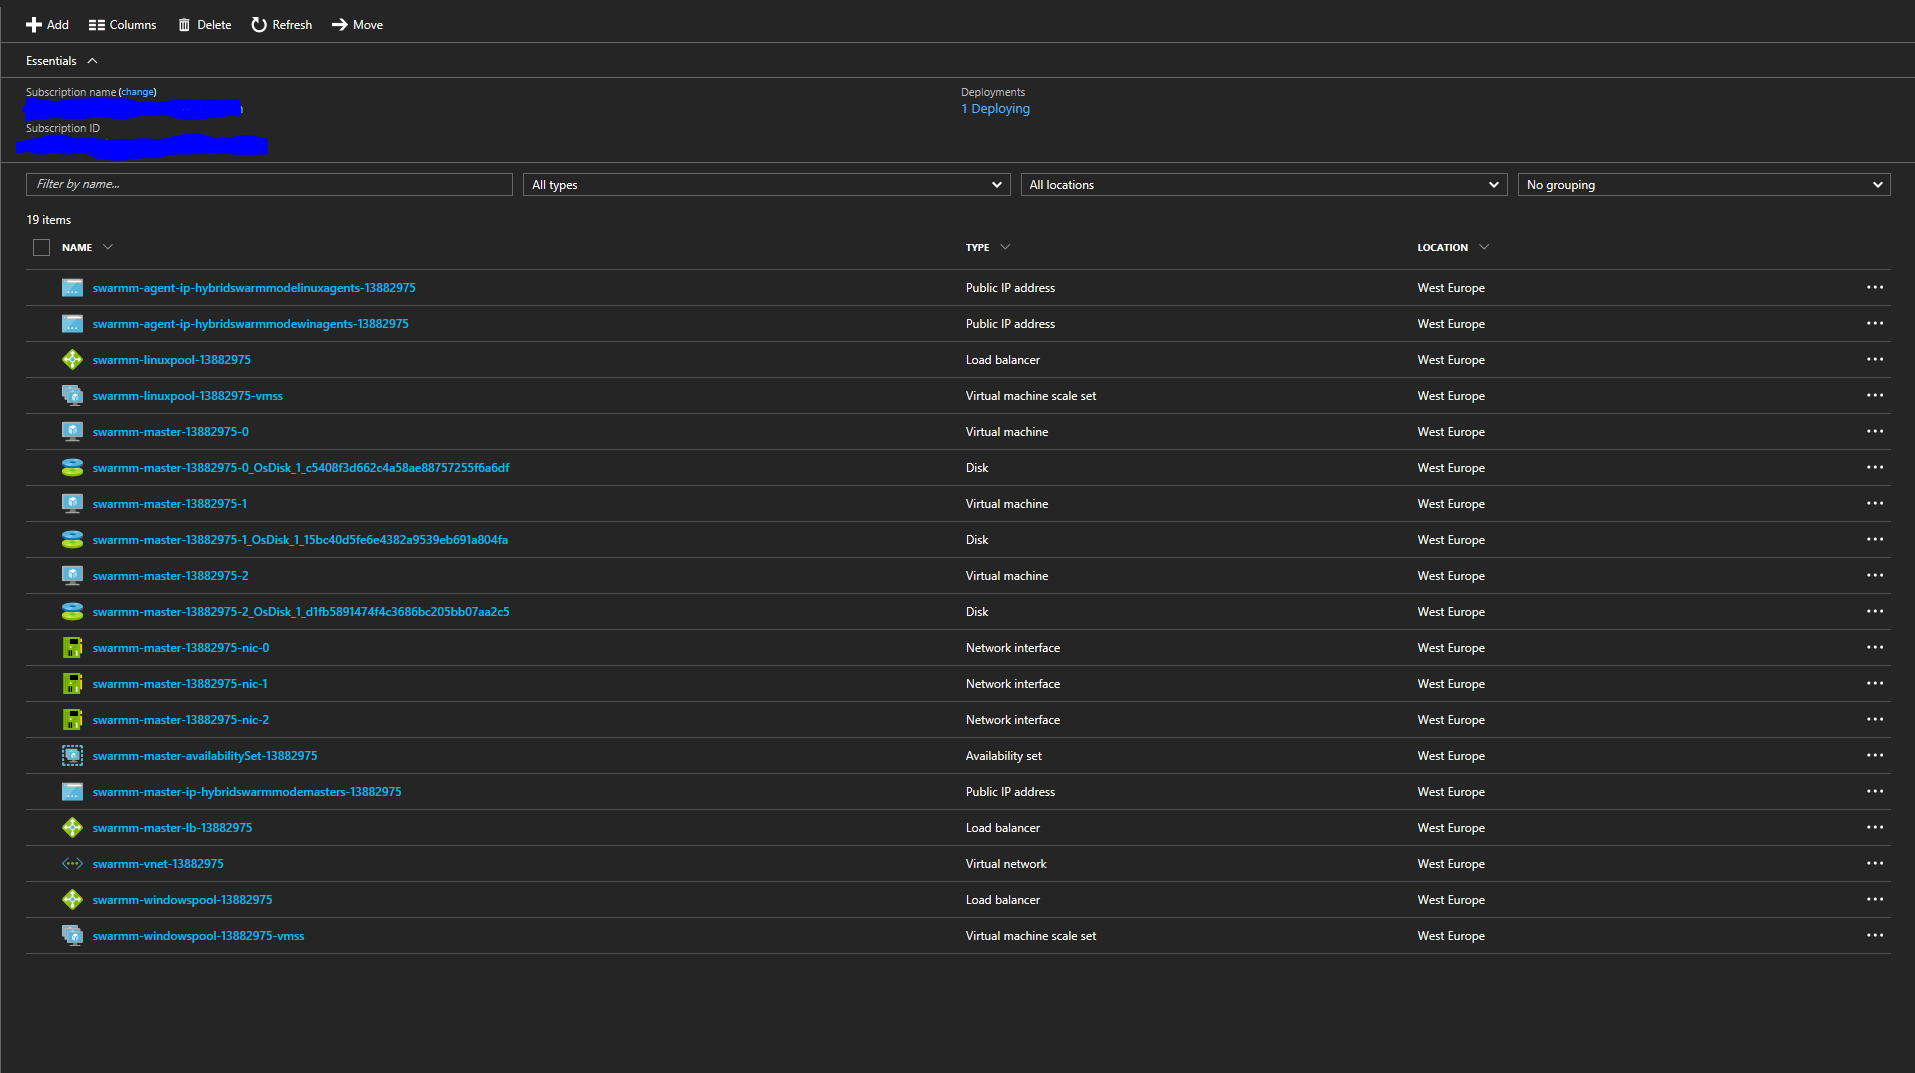
Notice the resources created in the resource group:
- 3 public IPs for masters, Linux agents and Windows agents
- load balancers for masters, Linux agents and Windows agents
- VM scale sets for the agents and availability sets
- network interfaces and OS disks for the masters
Connecting to the cluster
After the deployment succeeds, you are now ready to connect to the master. You will SSH into the masters using the user and SSH key you setup in the cluster definition file. The 3 FQDNs will have the following template:
{yourfqdnname}.{azurelocation}.cloudapp.azure.com
Each master can be publicly accessed using the FQDN and one of the ports (2200..220x) (So you will access the first master on 2200, the second master on 2201 and so on.). For example, to SSH into the first master, use the following:
ssh -i path-to-private-key azureuser@{yourfqdn}.{azurelocation}.cloudapp.azure.com -p 2200
Then, if you list all nodes in the cluster you might first see this:

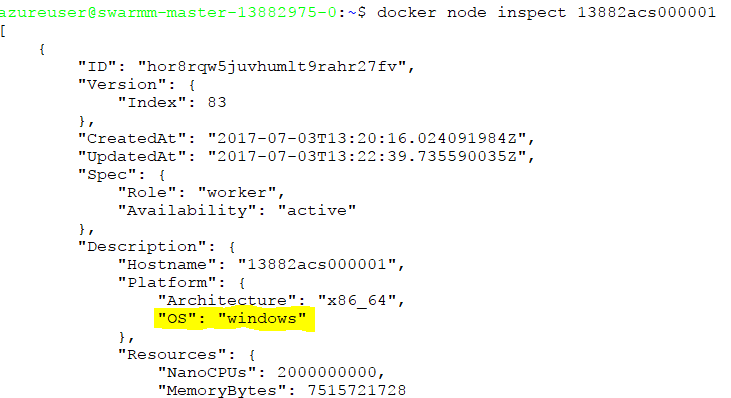
This means we only see the 3 masters and the 3 Linux agents. This means that even though the Windows nodes were deployed, they did not join the swarm.
A very quick solution is to reimage the Windows agents. This means restoring them to the initial state and executing all scripts that were executed when initializing the cluster.
A very probable cause of this could be that the script that joins the Windows agents to the cluster might get executed before the masters actually start.
After reimaging or restarting the VMs, your cluster should look like this:
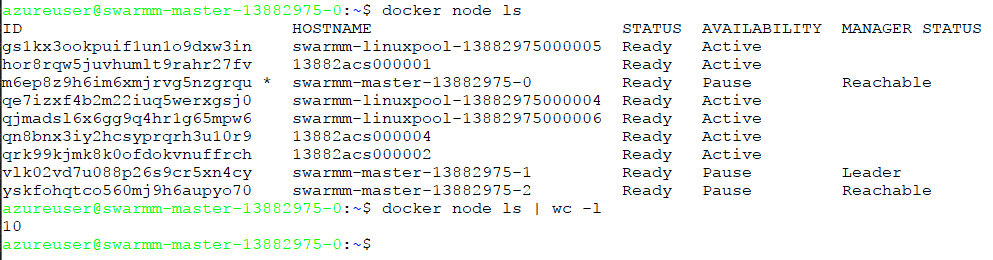
Now you have a full hybrid Swarm Mode cluster, with some Windows agents, as well as Linux ones:
Deploying services to the cluster
From now on, you can treat this cluster as any other Docker Swarm Mode cluster: with the single mention that you cannot run Linux containers on Windows and Windows containers on Linux. This means that when starting services, we need to put some restrictions in place.
We will deploy a simple Python web application on Linux that will use a Redis data store that we will run on Windows.
The Python application can be found here and is very similar to the Docker Compose one from the Official Docker Docs
The most important thing to notice in the stack file is the deployment constraint on the node operating system. As stated earlier, this is very important in the stack file as a Linux service will not run in a Windows host and vice-versa.
You can see that the redis service is based on the Windows version of Redis (not something that you would use in production, here just for showcase) and is based on the Nano Server image.
To deploy this on the master, you need the file above. You can copy it, or wget it directly: wget https://gist.githubusercontent.com/radu-matei/7543e906e3633075cd32231e46628bf1/raw/f5e06e372c9a5c57f555e8580eee1c1a5ccb635e/hybrid-stack.yml
Then, you need to create a new stack deployment:
docker stack deploy --compose-file hybrid-stack.yml python-redis
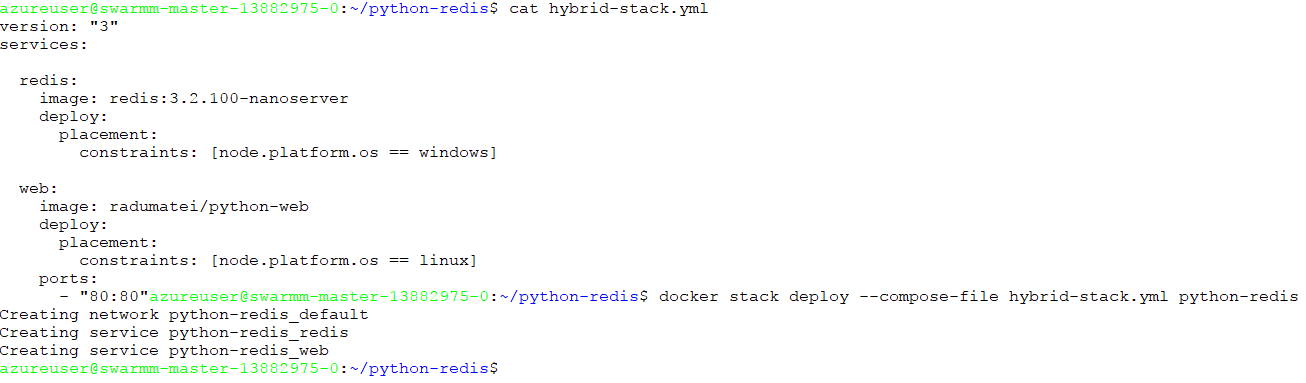
This will create two new services, the web and Redis ones, and a new network for them.

Since the Nanoserver Redis image is around 340 MB, it will take a little to pull it, then start a container.
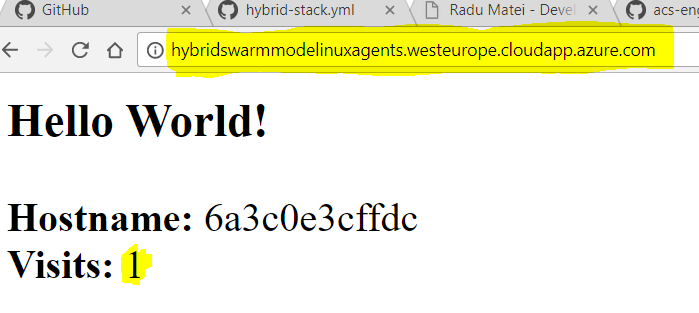
Now since the application that exposes ports is the one running on a Linux node (the web application), we will access it on the port 80 (the one exposed) of the Linux agent FQDN:
Conclusion
In this article we saw how to deploy a hybrid Swarm Mode cluster on Azure using acs-engine and how to deploy a mixed-OS containerized application on the cluster we created. Next, we will explore how to create a consistent CI/CD story with GitHub and Jenkins (with Linux and Windows slaves that are created dynamically for each build).
If you think this article could be better, please provide your feedback in the comments below.
Thanks for reading :)