Get started with Raspberry Pi3, Sense HAT and Azure IoT Suite
You can check the GitHub repository of this project for the full source code
In this blog post, we will get started with the Raspberry Pi3, the Sense HAT and Azure IoT Suite. More specifically, from the IoT Suite we will use IoT Hub, and Stream Analytics, which we will detail a little later.
The end goal of this little project is to acquire data from the sensors, upload the data to IoT Hub, which feeds it into Stream Analytics, with outputs to an Azure SQL database (for storage) and to Service Bus (for consuming the data in real-time from various applications).
What is Sense HAT?
The Sense HAT is an add-on board for Raspberry Pi, made especially for the Astro Pi mission to go in Space. The Sense HAT has an 8x8 RGB LED matrix, a five-button joystick and includes the following sensors:
- Gyroscope
- Accelerometer
- Magnetometer
- Barometric pressure sensor
- Humidity sensors
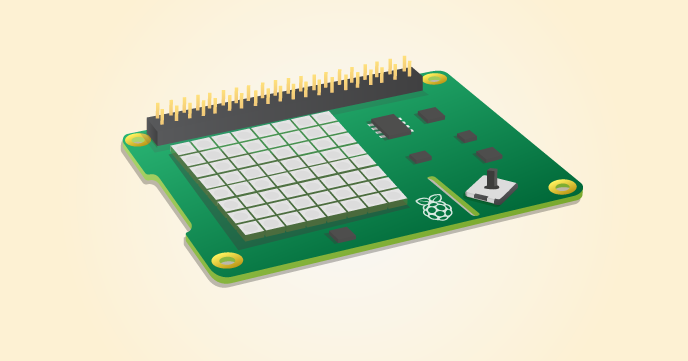
The Sense HAT - image from the official Raspberry Pi website
Basically, the Sense HAT is a board that has integrated sensors and a joystick, with an additional 8x8 LED matrix. It is a very fun board to play with and I recommend it if you don’t want (or know, for that matter) to get tangled in wires and in calculating resistances.
Assembling the two boards
In order to get started, we first need to assemble the HAT on the Pi.
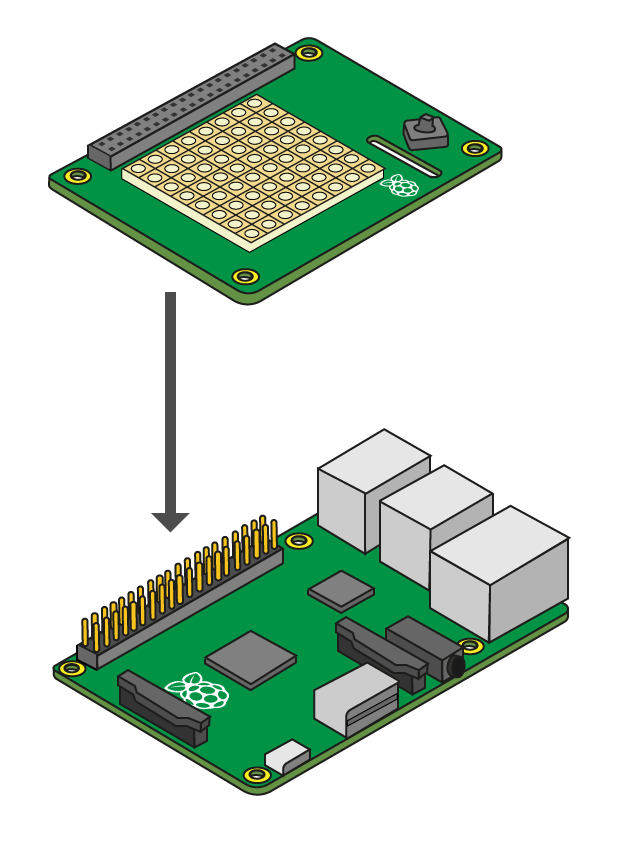
Image from the official Raspberry Pi website
After carefully assembling the two boards (watching not to bend the pins of either boards) and putting the screws and the hexagonal stand-offs in place, you are ready to go. If successful, the end result should look similar to this:

You can follow the instructions here to install Windows IoT Core on your Raspberry Pi.
Assuming you assembled the board and installed Windows on your Raspberry, we are ready to get started.
Creating a Windows Universal App that will run on the Raspberry
At this moment there is no official .NET library to work with the Sense HAT. There is an official Python library and you can get started with it here.
While there is no official .NET library, there is a library developed by Mattias Larsson which provides exactly the functionality we need. You can find the source code on GitHub and the package on NuGet.
If you are a complete beginner with Windows IoT Core and the Raspberry Pi3, I strongly recommend you go through this step-by-step tutorial on how to get started with the installing, configuring and writing your first app on the Raspberry Pi3 with Windows IoT Core:
- Step 1 of 4: Get the Tools
- Step 2 of 4: Set up your device
- Step 3 of 4: Set up Visual Studio
- Step 4 of 4: Write your first app
After this, you can find multiple examples with various hardware components and software services, from the Windows IoT developer website or from Hackster.
Here you can find a very brief introduction to creating UWP apps and a Hello, World example.
Creating the app architecture
At this point, we can choose between two approaches:
- have the entire logic (including the communication with the Sense HAT and the cloud) in the UWP application
- create separate (and reusable) class library projects that can be referenced from the UWP application
For this project, we will go with the second approach (and you can already review the source code on GitHub).
In this case, I went with the following naming conventions for the solution and the projects:
- the name of the solution:
RPiSenseHatTelemetry- the name of various projects:
RPiSenseHatTelemetry.SpecificProjectFunctionality
To get started, open Visual Studio and create a new Universal Windows app for Windows 10. There is nothing specific for Raspberry Pi or Sense HAT yet, just a typical UWP app. (In my case, the naming was: RPiSenseHatTelemetry.Uwp).
The telemetry collected and analyzed
In this very simple example, we will only get the temperature telemetry, with the Celsius value and the timestamp of the measurement.
Since we plan on taking more telemetry than temperature (and use these classes in other projects), we will create a project called RPiSenseHatTelemetry.Common that we will reference later.
public class TemperatureTelemetry
{
    public string Time { get; set; }
    public double Temperature { get; set; }
}
The Sense HAT Communication Project
Right now, we need to have specific functionality for communicating with the Sense HAT. In a new class library project (in this case called: RPiSenseHatTelemetry.SenseHatCommunication), add the NuGet package for the Sense HAT: Install-Package Emmellsoft.IoT.RPi.SenseHat. This will add a bunch of files and folders to your project (mainly for demo and testing purposes) that we will not use, all we need is the reference to the Emmellsoft.IoT.RPi.SenseHat dll.
The main thing that we will use from this library is exposed through the ISenseHat interface, which you can find in the library’s GitHub repository.
The best place to learn how to use this library is the demo section of the repository. There you can find how to create a compass, how to make disco lights from the 8x8 LED matrix or write the temperature on the LED matrix.
We will create a new class that will only expose functionality related with the temperature telemetry, but you can expand this class to do all the things you want.
using System;
using System.Threading;
using System.Threading.Tasks;
using Emmellsoft.IoT.Rpi.SenseHat;
using RPiSenseHatTelemetry.Common;

    public class SenseHat : IDisposable
    {
        private ISenseHat _senseHat { get; set; }

        public async Task Activate()
        {
            _senseHat = await SenseHatFactory.GetSenseHat().ConfigureAwait(false);

            _senseHat.Display.Clear();
            _senseHat.Display.Update();
        }

        public TemperatureTelemetry GetTemperature()
        {
            while (true)
            {
                _senseHat.Sensors.HumiditySensor.Update();

                if (_senseHat.Sensors.Temperature.HasValue)
                {
                    return new TemperatureTelemetry()
                    {
                        Time = DateTime.UtcNow.AddHours(3).ToString("yyyy-MM-dd HH:mm:ss.fff"),
                        Temperature = Math.Round(_senseHat.Sensors.Temperature.Value, 2)
                    };
                }

                else new ManualResetEventSlim(false).Wait(TimeSpan.FromSeconds(0.5));
            }
        }

        public void Dispose()
        {
            _senseHat.Dispose();
        }
    }
We will obtain the actual object that does the communication with the board through SenseHatFactory and we will use this object throughout our class.
In the Activate method, we get the reference to the ISenseHat object through the factory, then we turn off the LED matrix (since we don’t want to have it on at all times when it’s running).
We also have a Dispose method, since the _senseHat is disposable.
The GetTemperature method is pretty straightforward: we check if the temperature sensor has value. If it does, we create a new TemperatureTelemetry object with the corresponding timestamp and temperature that we return. If the sensor doesn’t have a value, we wait half a second and try again.
This is the entire code that deals with the Sense HAT.
Displaying the temperature in the UWP app
In the MainPage of the UWP app, we need to have a SenseHat property in order to get the temperature once every three seconds, that we then display.
public sealed partial class MainPage : Page
{
    private SenseHat _senseHat { get; set; }

    public MainPage()
    {
        this.InitializeComponent();

        _senseHat = new SenseHat();
        this.ActivateSenseHat();

        this.Loaded += (sender, e) =>
        {
            DispatcherTimer timer = new DispatcherTimer();

            timer.Tick += async (x, y) =>
            {
                var temperatureTelemetry = _senseHat.GetTemperature();
                this.temperatureTextBlock.Text = "Temperature: " +
                                                    temperatureTelemetry.Temperature.ToString() +
                                                    "at " +
                                                    temperatureTelemetry.Time;
            };

            timer.Interval = TimeSpan.FromSeconds(3);
            timer.Start();
        };
    }

    private async void ActivateSenseHat()
    {
        await _senseHat.Activate();
    }
}
After the page has loaded, we use a DispatcherTimer object and every 3 seconds we get a new value from the sensors and display it in the UWP app.
Later, in the same place as we displayed in the app, we will send the data to IoT Hub and we will write the value on the HAT LED matrix.
Communicating with the Cloud - Azure IoT Hub
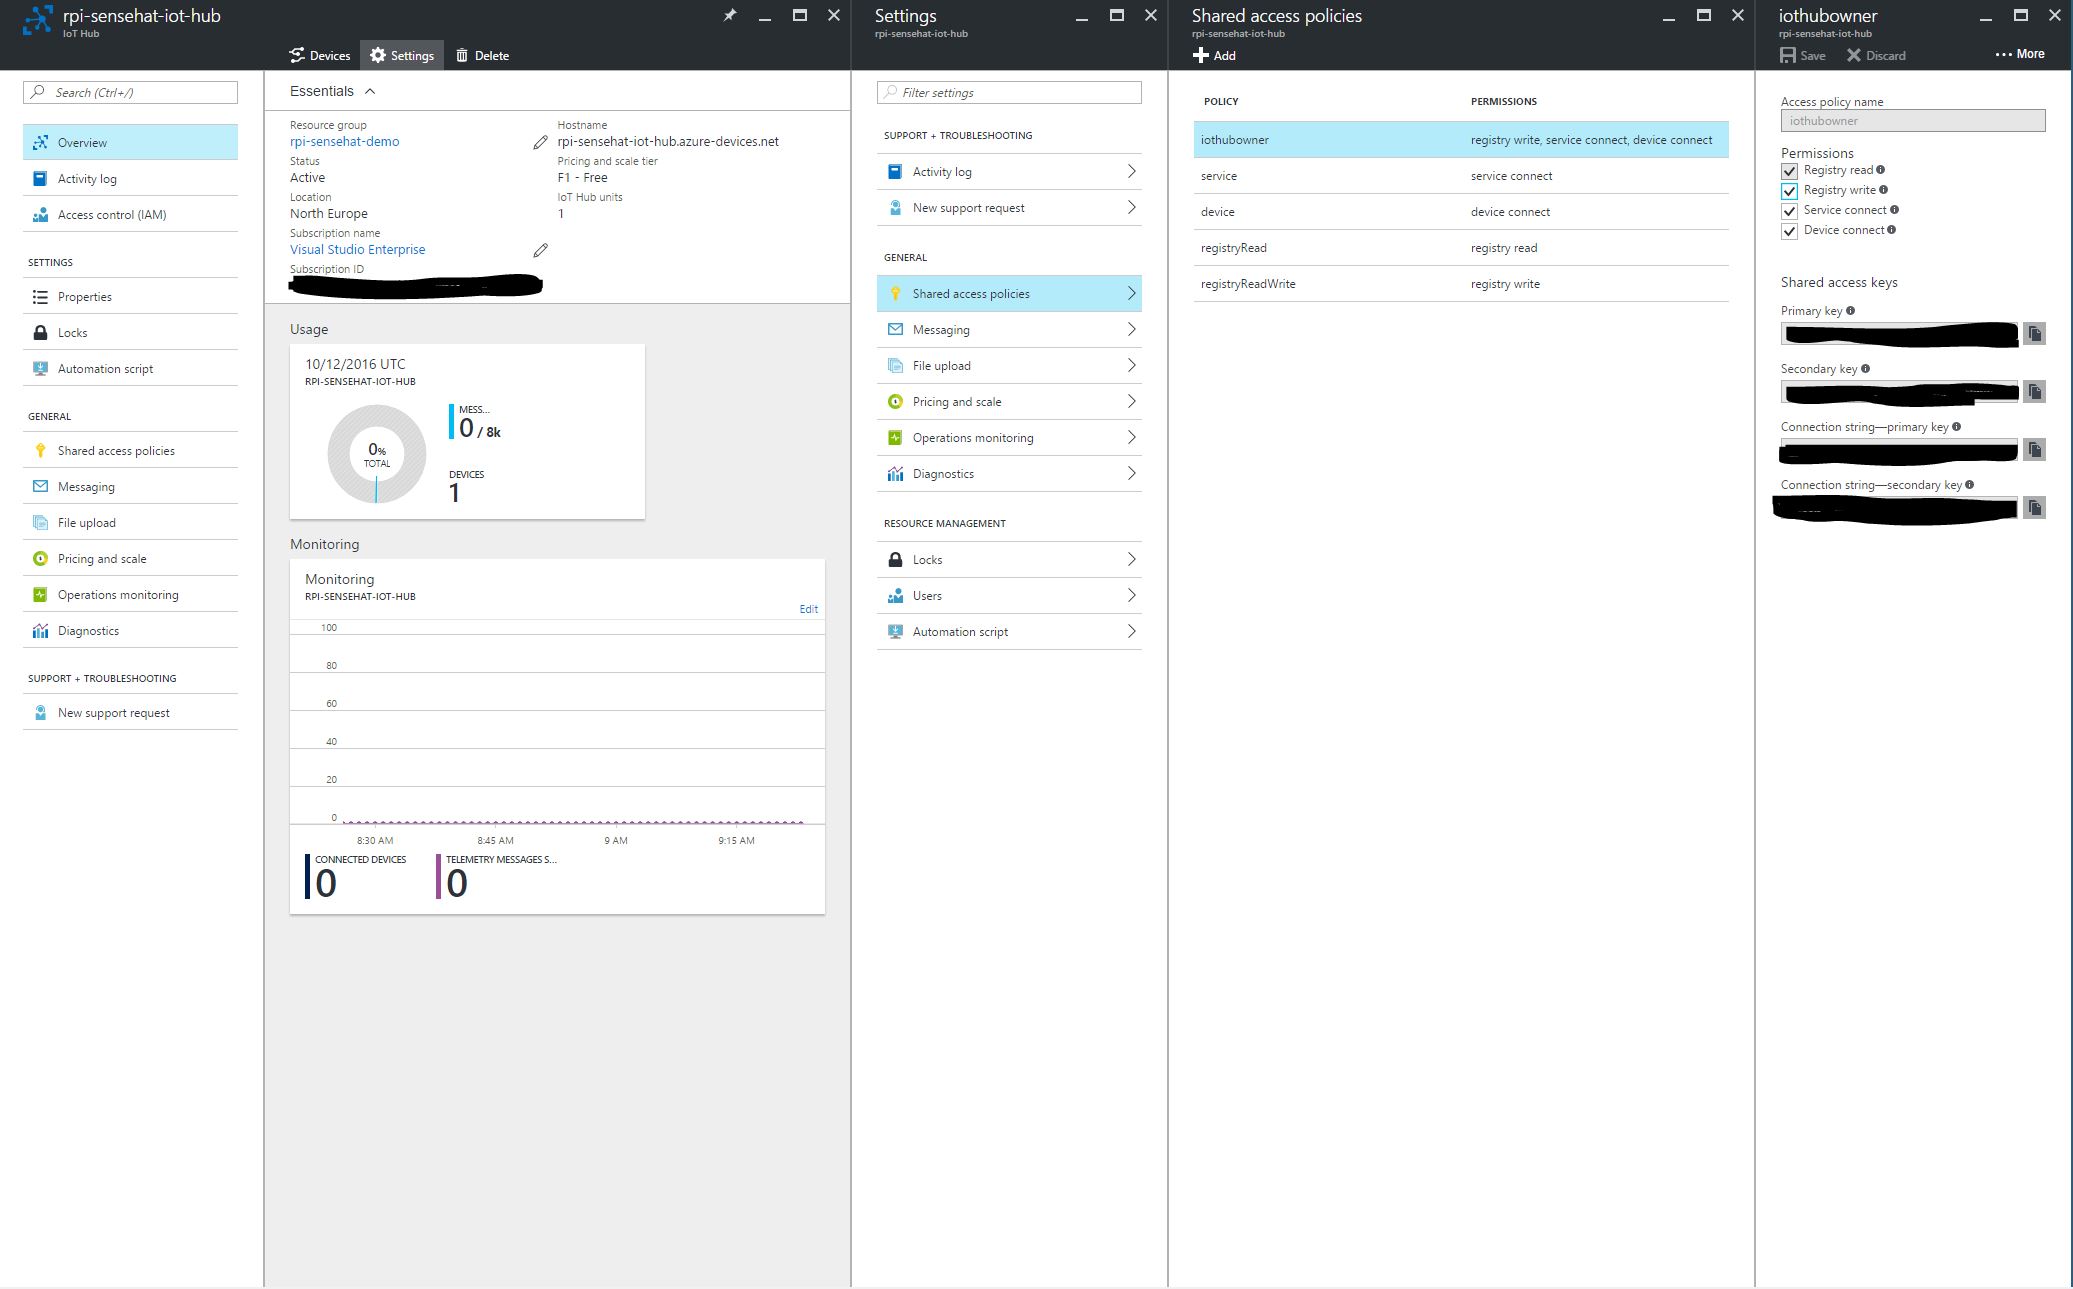
First of all, we need to create an Azure IoT Hub. To do this, follow the instructions here.
At this point, you can start using the Device Explorer - a small application that you can use to see the IoT Hubs from Azure and their connected devices. From here, you can add devices that are authorized to send data to the IoT Hub and see the messages that arrive on the IoT Hub in real-time, while also having the ability to send messages to the device.
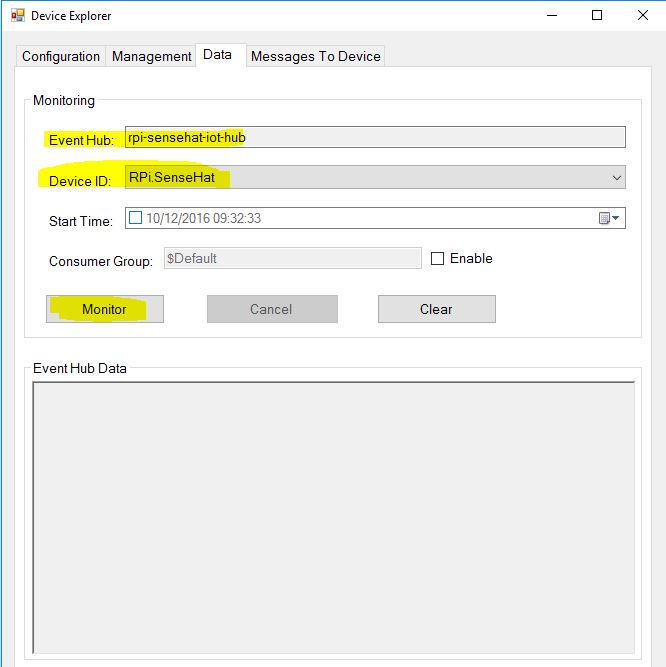
In this case, I created a device called RPi.SenseHat that sends the temperature telemetry to the hub.
To communicate with the cloud, I created a separate project - RPiSenseHatTelemetry.CloudCommunication, where I created a class called IoTHubCommunication that deals with sending a receiving messages from the cloud.
using System;
using System.Text;
using System.Threading.Tasks;
using Microsoft.Azure.Devices.Client;

    public class IoTHubConnection : IDisposable
    {
        private DeviceClient _deviceClient { get; set; }

        public IoTHubConnection()
        {
            _deviceClient = DeviceClient.CreateFromConnectionString(GetConnectionString(), TransportType.Amqp);
        }

        public async Task SendEventAsync(string payload)
        {
            await _deviceClient.SendEventAsync(new Message(Encoding.ASCII.GetBytes(payload)));
        }

        public async Task<string> ReceiveEventAsync()
        {
            while (true)
            {
                var receivedMessage = await _deviceClient.ReceiveAsync();

                if (receivedMessage != null)
                {
                    var messageData = Encoding.ASCII.GetString(receivedMessage.GetBytes());
                    await _deviceClient.CompleteAsync(receivedMessage);
                    return messageData;
                }
                await Task.Delay(TimeSpan.FromSeconds(1));
            }
        }


        private string GetConnectionString()
        {
            return "your-connection-string";
        }

        public void Dispose()
        {
            _deviceClient.Dispose();
        }
    }
Basically, the methods we will use are SendEventAsync, which sends an event asynchronously and ReceiveEventAsync which receives and event asynchronously.
You can also use a VS extension to add a class that makes the communication with an IoT Hub you select. Here you can find a tutorial on how to start publishing events from a UWP app with Azure IoT Hub.
Adding cloud communication to the UWP app
To add the cloud communication to the UWP app, simply create a new instance of our newly created class, IoTHubConnection and use the SendEventAsync method in the MainPage.xaml.cs file.
timer.Tick += async (x, y) =>
{
    var temperatureTelemetry = _senseHat.GetTemperature();
    this.temperatureTextBlock.Text = "Temperature: " +
                                        temperatureTelemetry.Temperature.ToString() +
                                        "at " +
                                        temperatureTelemetry.Time;

    await _iotHubConnection.SendEventAsync(JsonConvert.SerializeObject(temperatureTelemetry));
};
Sending the data from IoT Hub to Stream Analytics
You can get started on what is Stream Analytics here. This is an introduction on building IoT solutions with Stream Analytics.
Right now we have data going from the Raspberry Pi to the IoT Hub, but nothing more happens with that data. At first, we will send the data to an Azure SQL database.
This is a step-by-step tutorial on how to create an Azure SQL database.
After creating the Stream Analytics service in Azure, we need to add input data, in this case from the IoT Hub:
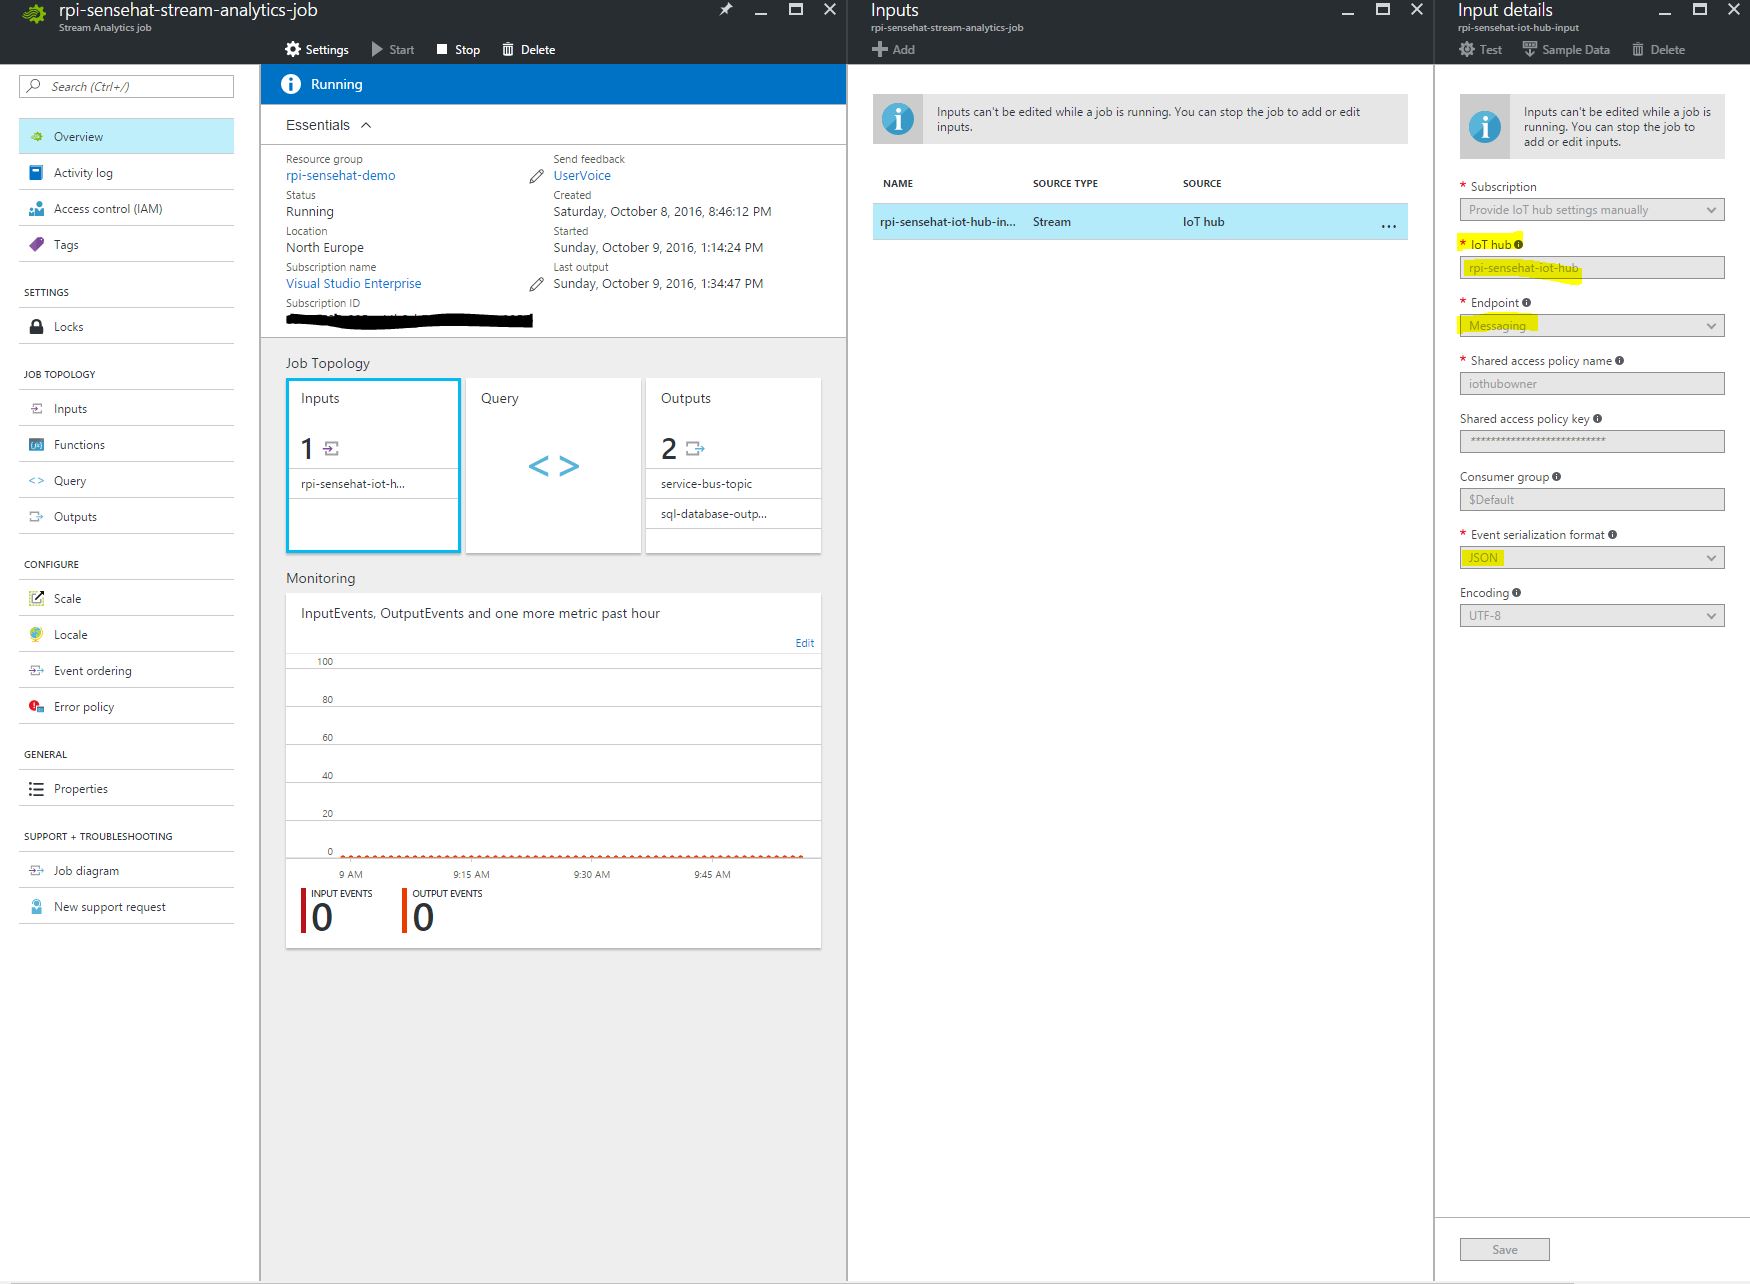
We also need to configure an output, an Azure SQL database:
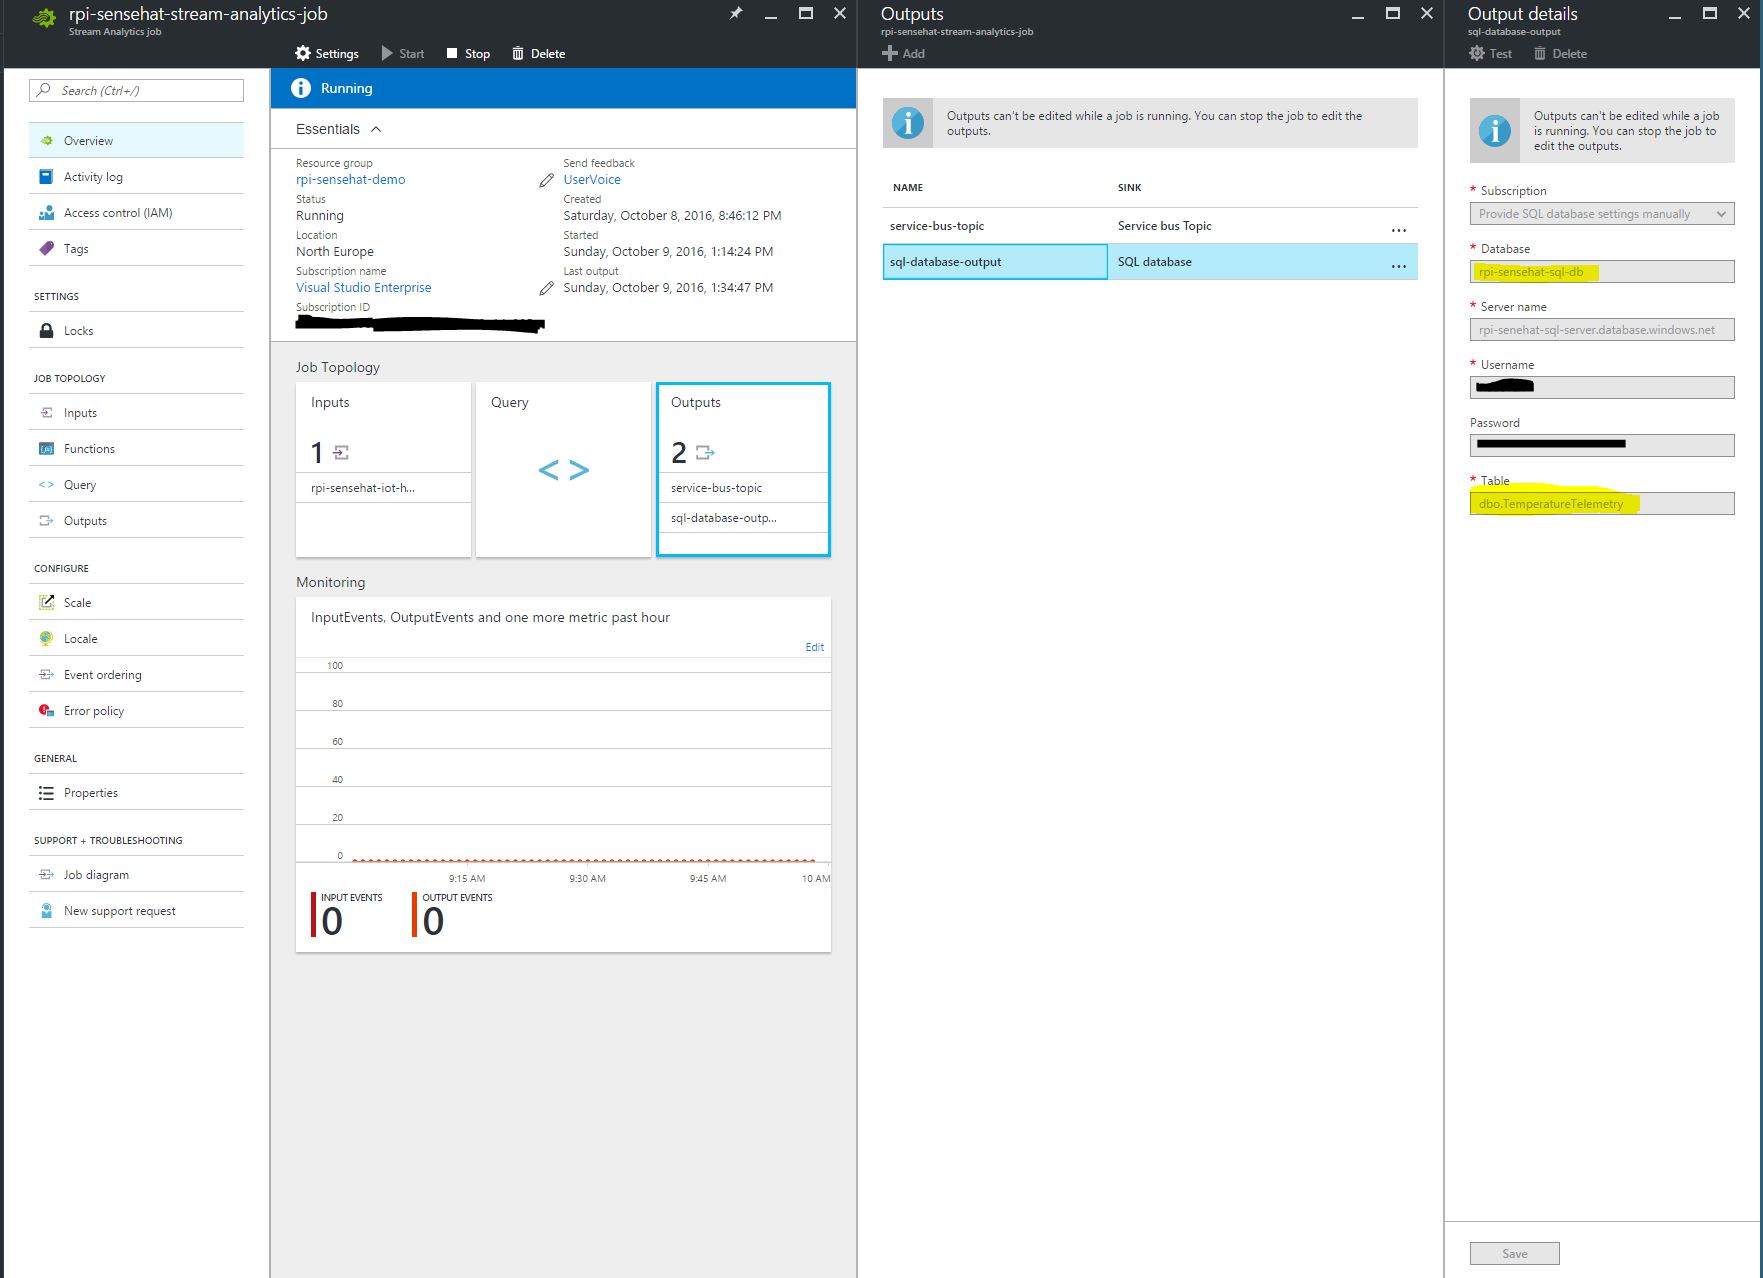
Notice how we also need to configure a table for our data to be stored. This table should have the same structure as our TemperatureTelemetry objects that we send.
This is the script I used for creating the table for the temperature telemetry:
CREATE TABLE [dbo].[TemperatureTelemetry] (
    [Time]        DATETIME   NULL,
    [Temperature] FLOAT (53) NOT NULL
);
At this point, we need a Stream Analytics query that takes the data from IoT Hub and puts it into our SQL database:
SELECT
    Time, Temperature
INTO
    [sql-database-output]
FROM
    [rpi-sensehat-iot-hub-input]
The names
sql-database-outputandrpi-sensehat-iot-hub-inputare the names I gave the SQL database as output and the IoT Hub as input, respectively.
Testing and running the application
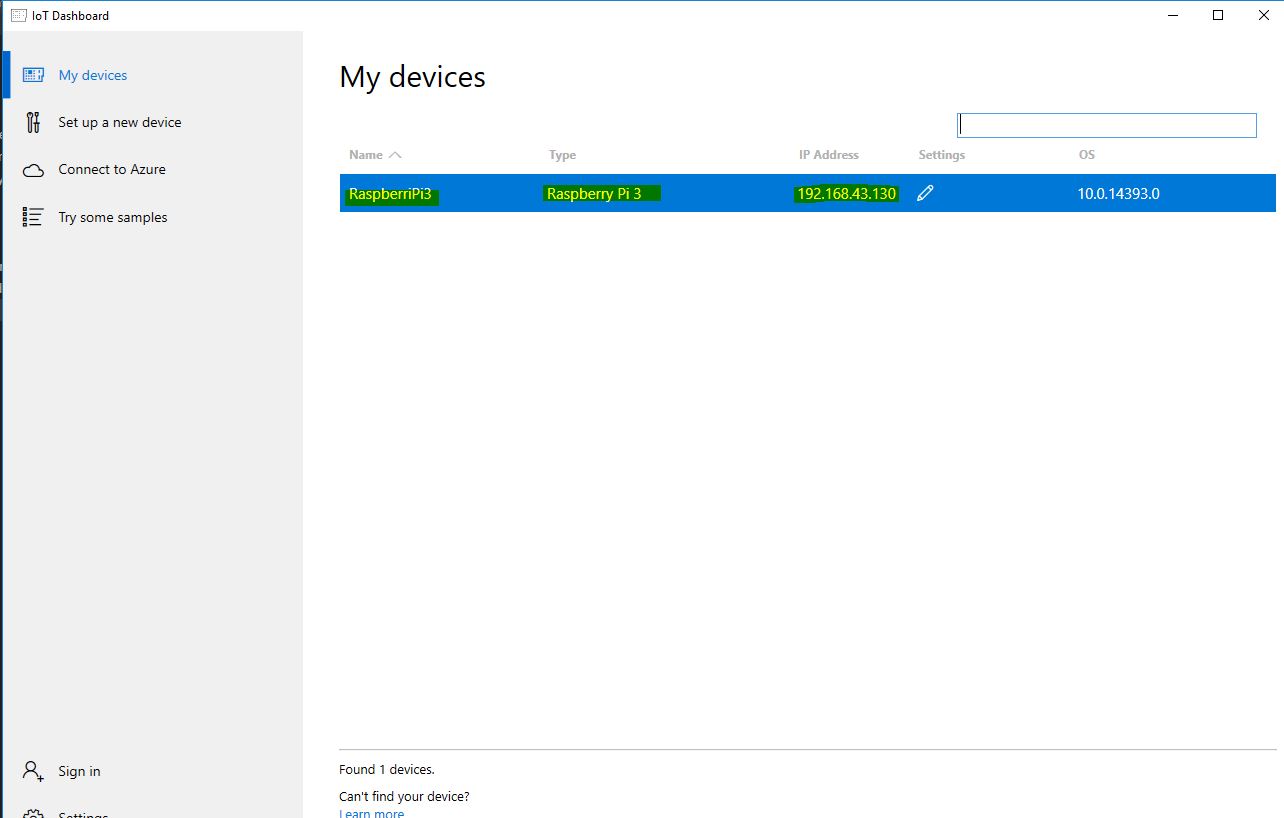
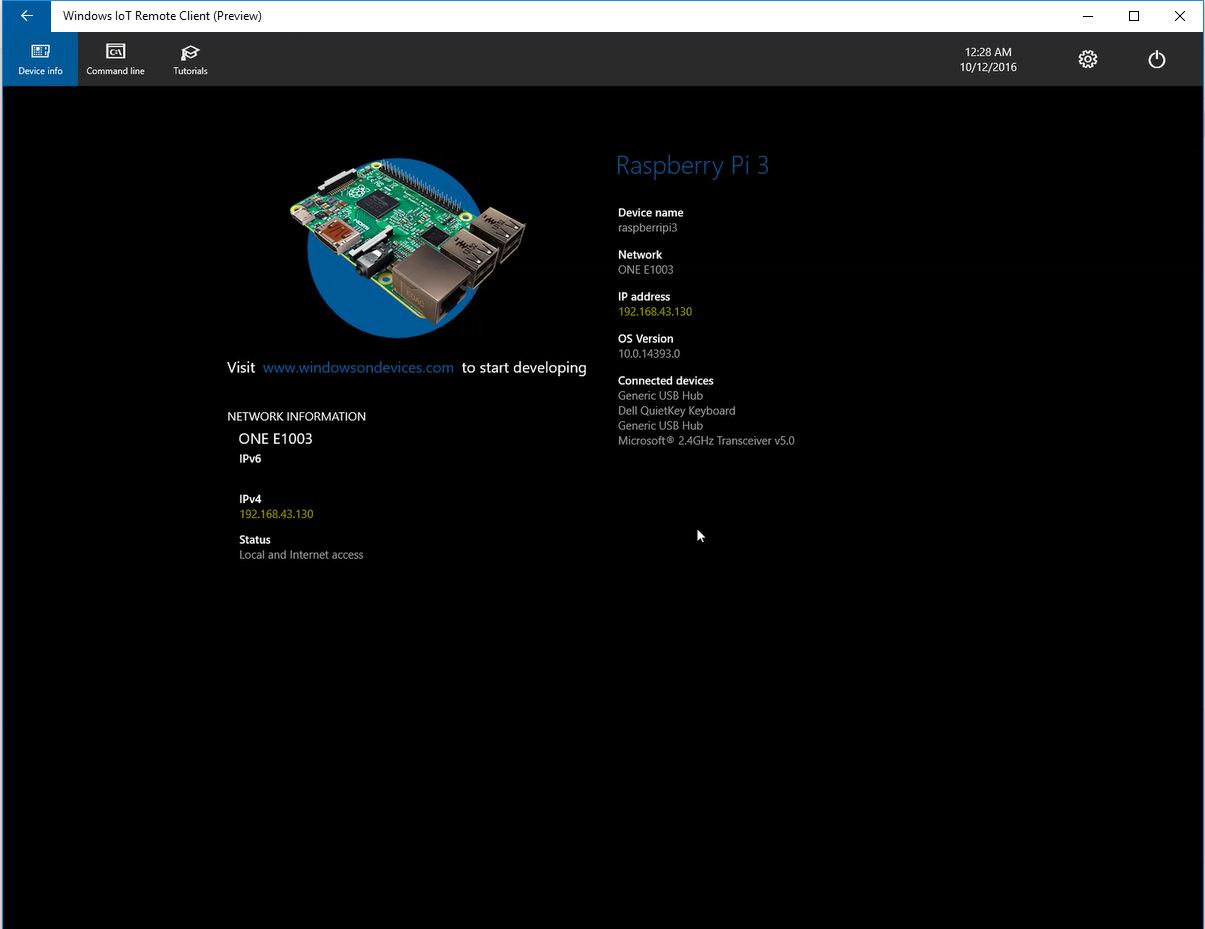
Right now, we can run the application remotely from Visual Studio to our Raspberry Pi by finding the IP in the IoT Dashboard application:
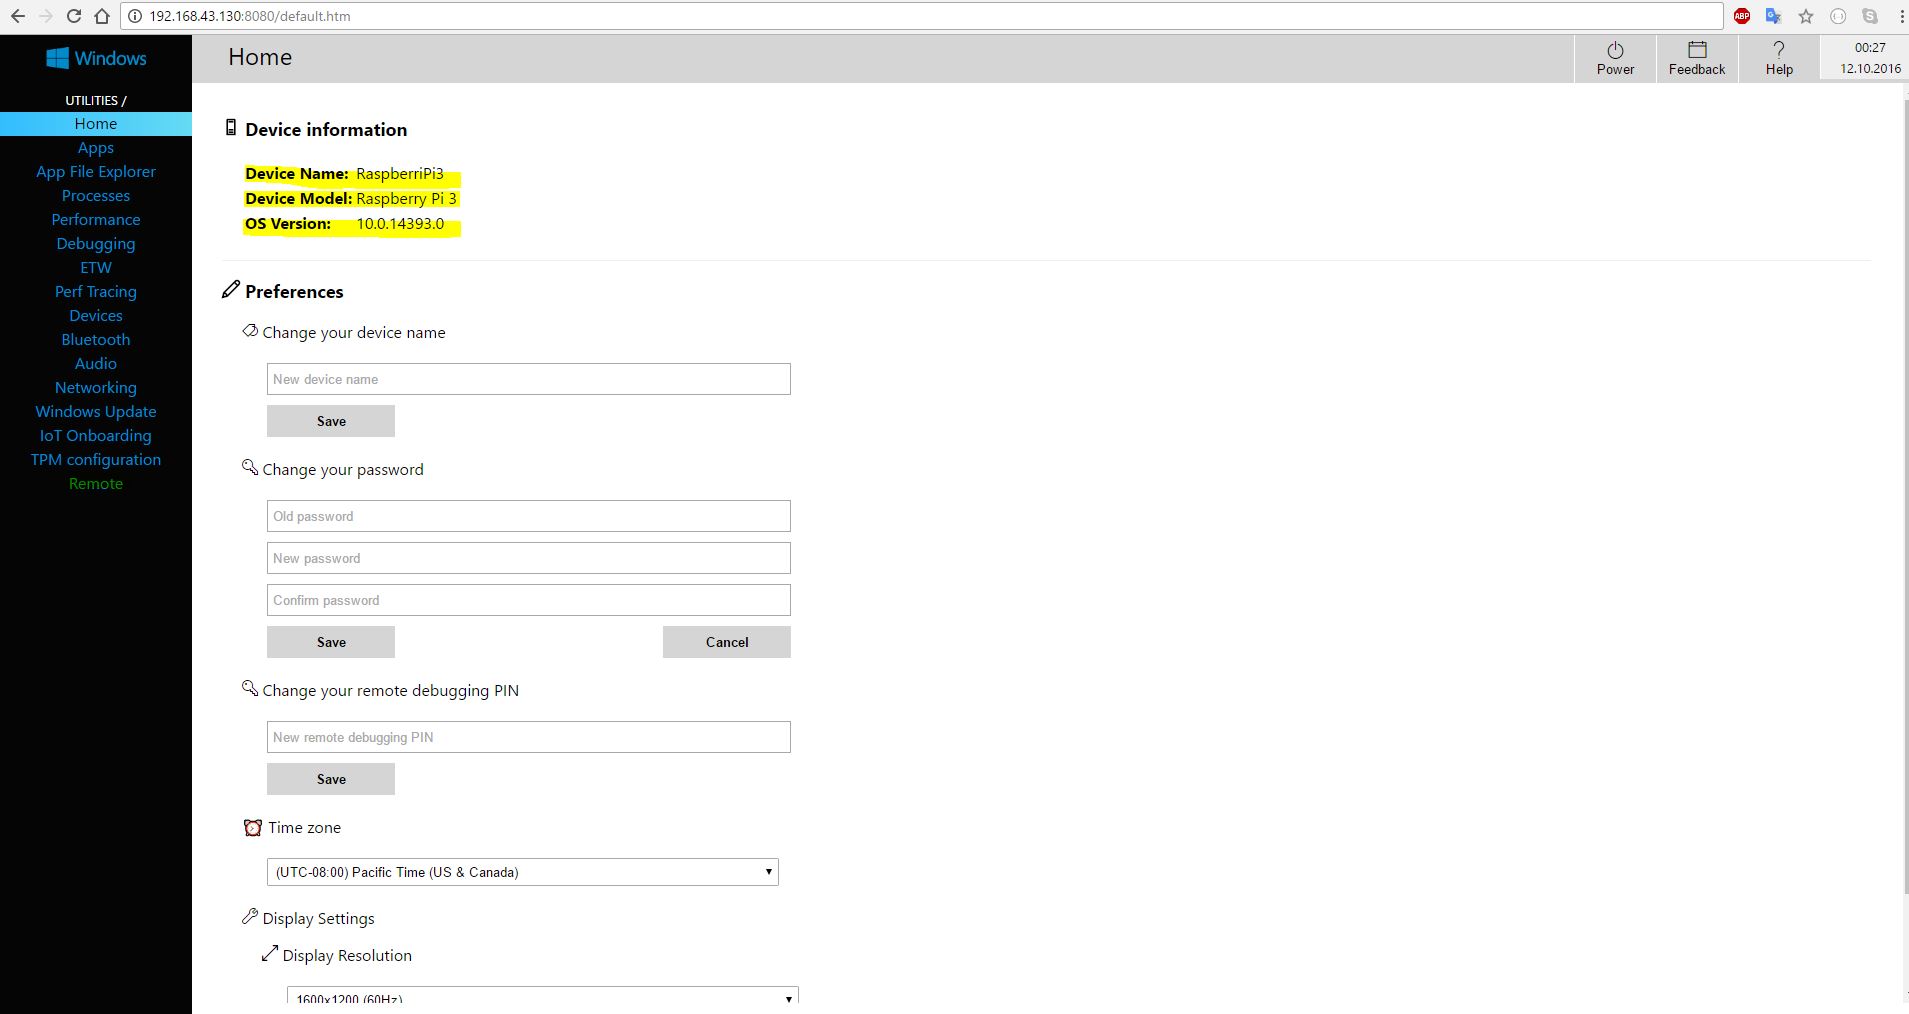
We can also connect from our browser through the device portal:
We can also create a remote desktop connection to our Raspberry:
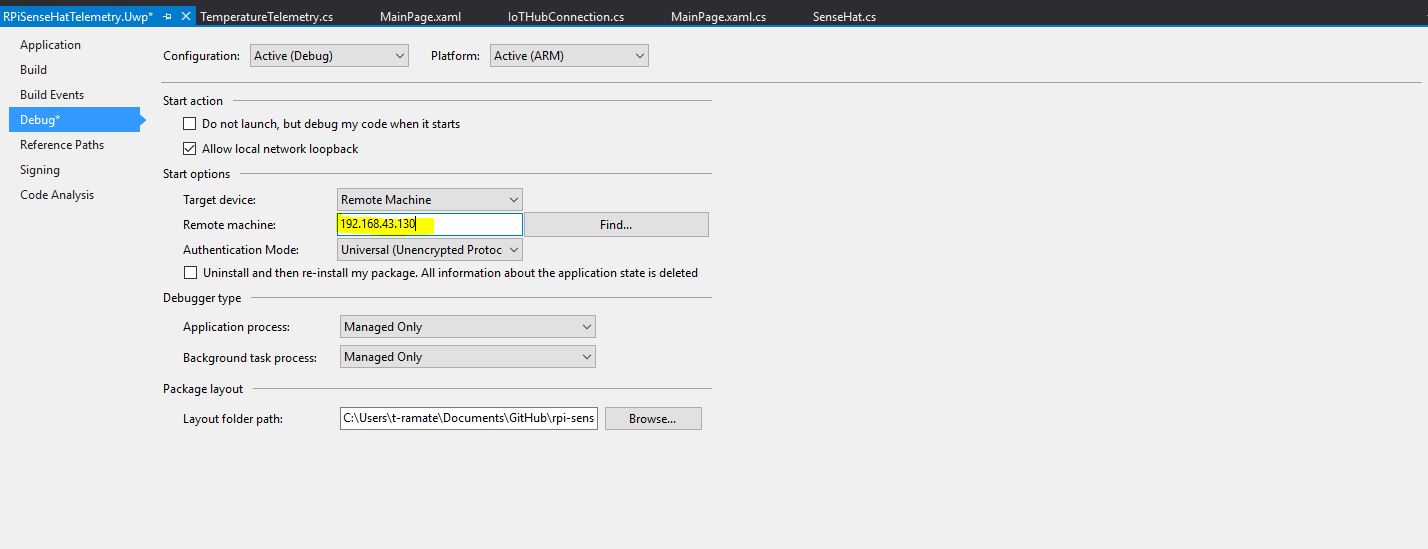
From Visual Studio, we deploy our application to a remote device:
After the application is successfully deployed, we will see data coming into the IoT Hub through the Device Explorer, and also in the SQL database we created as output for the Stream Analytics job.
And here is the data that arrives in the SQL database:
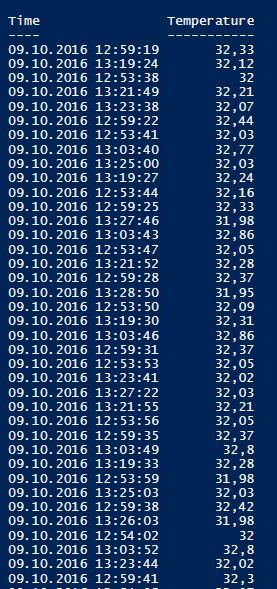
The query above is made through PowerShell, through a custom script I made for querying and making commands to a SQL database without the SQL Server Management Studio. You can find the script here with demo usage.
In a following article, we will configure an additional output for the Stream Analytics job, a Service Bus that will allow us to use the messages real-time in a web (or even mobile) application, with custom alerts. We will also create a command from the IoT Hub based on an alert from the Stream Analytics job that will turn on or off the LED matrix (and will even control an Arduino connected through USB). We will also write the current temperature on the LED matrix.
Conclusion
We created a very simple UWP app that takes data from the Sense HAT sensors, displays it on the screen, then sends it through Azure IoT Hub, then to a Stream Analytics job that outputs it into an Azure SQL database.