Kubernetes 1.8 on Azure
This tutorial uses Azure to provision the infrastructure required to run a Kubernetes cluster. If you don’t have an Azure subscription you can create a free account and get $200 for 12 months.
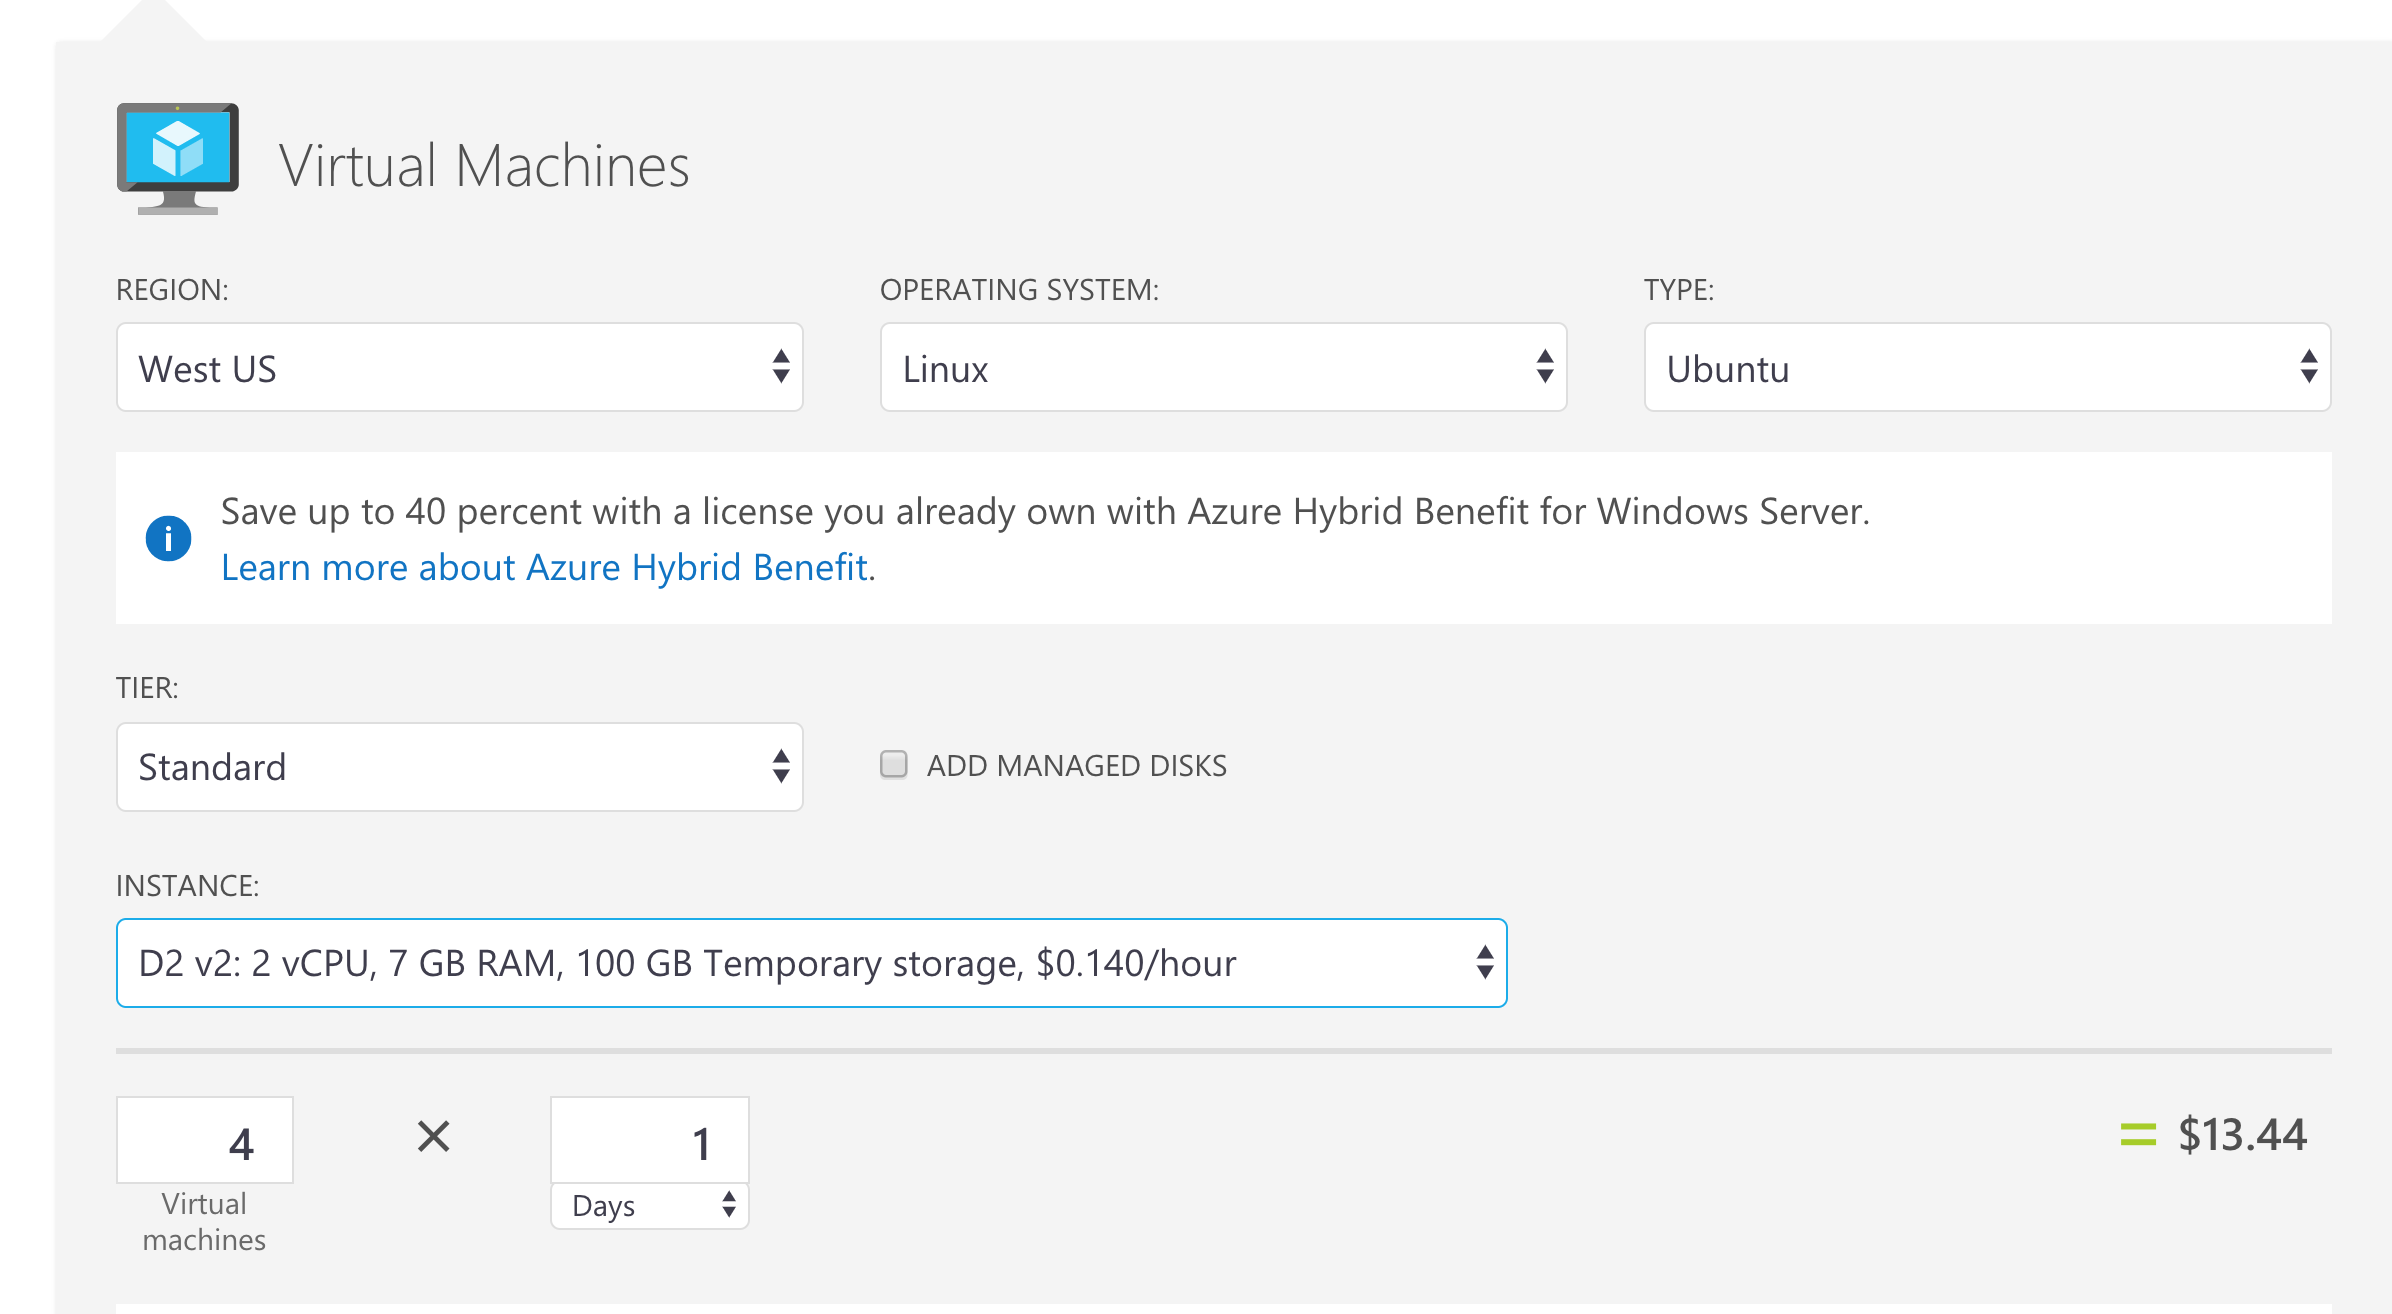
This tutorial deploys 4 D2_V2 VMs (1 master + 3 agents) with Linux that will cost approximately $13 - $14 / day, but you can change the type of the VM to be D1_V2, and the cost will go down to $6 / day.
Note that the pricing will vary slightly based on the location where you deploy the VMs.
Cost estimation created using the Azure Pricing Calculator
Introduction
On September 28th, Kubernetes hit version 1.8 with improved support for Role Based Access Control (RBAC), TLS certificate rotation and other cool features. You can read the full blog post that announces the release here and you can see the release on GitHub and the associated changelog with all new features.
In this article we will explore how to deploy a Kubernetes cluster with version 1.8 on Azure.
If you are familiar with deploying orchestrators in Azure, or you only want to see how to deploy Kubernetes 1.8, you can skip the following section and go directly to where the action actually starts.
Deploying orchestrator clusters in Azure
There are a couple of ways to deploy an orchestrator cluster in Azure. First, there is Azure Container Service (that we used in the past to deploy a Kubernetes cluster). Azure Container Service allows you to easily deploy Kubernetes, Docker Swarm or DC/OS clusters from the Azure Portal or using the az command line. This is the way to go if you don’t want to customize your cluster and you are ok with the default values that Azure provides for you.
Then there is a tool called acs-engine. This is basically the “engine” that Azure Container Service uses to deploy your clusters, and we will use it to deploy a custom version of our Kubernetes cluster, in this case the new 1.8 version.
acs-engine takes a cluster definition file where you can specify options for your cluster (like orchestrator to use - Kubernetes, Docker Swarm Mode, DC/OS and their specific versions, networking policies, master and agent profiles and others) and generates ARM (Azure Resource Manager) templates that Azure uses to deploy all resources for your cluster (VMs for masters and agents with your orchestrator configured, load balancers, networking, storage adn other resources).
Kubernetes 1.8 has just been released, and together with it came v0.8.0 of acs-engine with support for Kubernetes 1.8.
You can follow this article on your local machine, inside a Docker container or using the Azure Cloud Shell, and all of these versions being very similar (basically you only change the OS version of the acs-engine binary).
Getting the acs-engine binary
In this step all you need to do is download the the binary associated with v0.8.0 of acs-engine for your operating system. I will use the Azure Cloud Shell (which is Linux), but you can do the same thing for macOS (by getting the Darwin specific binaries) or for Windows.
First you need to download the GitHub release archive for Linux:
wget https://github.com/Azure/acs-engine/releases/download/v0.8.0/acs-engine-v0.8.0-linux-amd64.tar.gz
Then, you need to unarchive it:
tar -xvzf acs-engine-v0.8.0-linux-amd64.tar.gz
This will create a folder called acs-engine-v0.8.0-linux-amd64, and inside it you will find (among the license and the readme) the acs-engine binary.
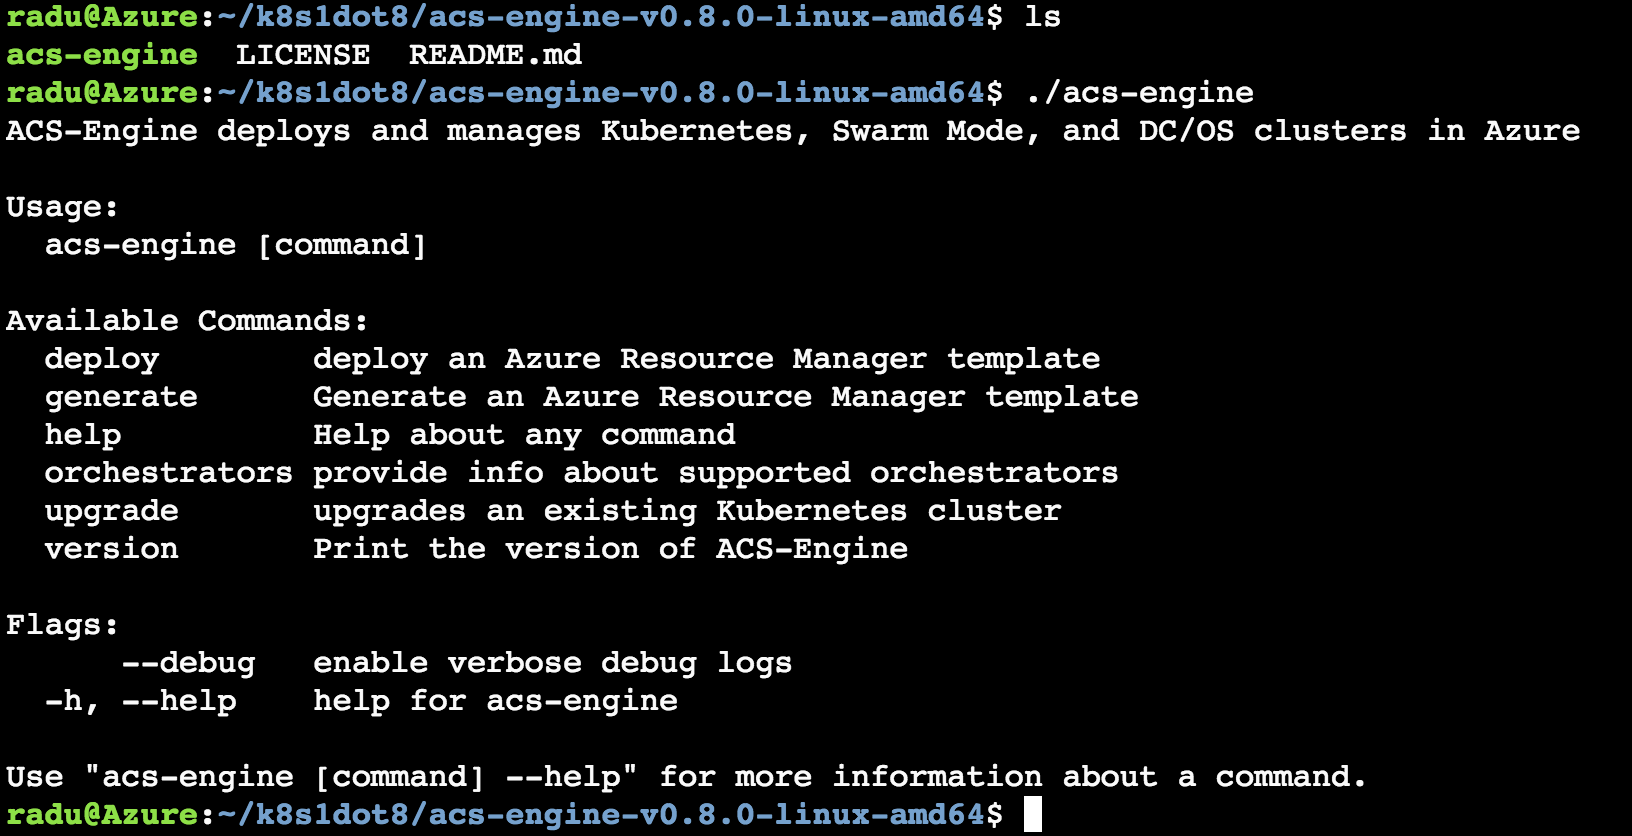
Now you only need to put it in your path (or move it to a directory that is in your path) and you have the acs-engine binary accessible from anywhere.
We will now use this binary inside the Azure Cloud Shell to deploy a Kubernetes 1.8 cluster to Azure, using a cluster definition template file.
Deploy the cluster
This is how a typical cluster definition file looks for Kubernetes. Compared to the example offered in the repo, this only adds the orchestratorRelease property and sets it to 1.8.
The great thing about this version of acs-engine is that you will only need one command to deploy this, and you pass a few parameters (in older versions you would generate ARM templates using acs-engine and deploy them with the az command line):
- an Azure subscription id (you can find it using
az account show) - a DNS prefix for your cluster
- the location of your cluster
- the cluster definition file from above
acs-engine deploy
        --subscription-id <your-subscription-id> \
        --dns-prefix <your-dns-prefix> --location westeurope \
        --auto-suffix --api-model kubernetes18.json
Note the
orchestratorReleaseproperty in the JSON file set to1.8! Note that it automatically creates all assets for you including a service principal and a resource group.
Since you are in the Azure Cloud Shell, you are already authenticated into your Azure account. If you run elsewhere, the will be another step involved where you login to
aka.ms/devicelogin.

After the deployment succeeds, you should see a resource group in your subscription with all your Kubernetes assets:
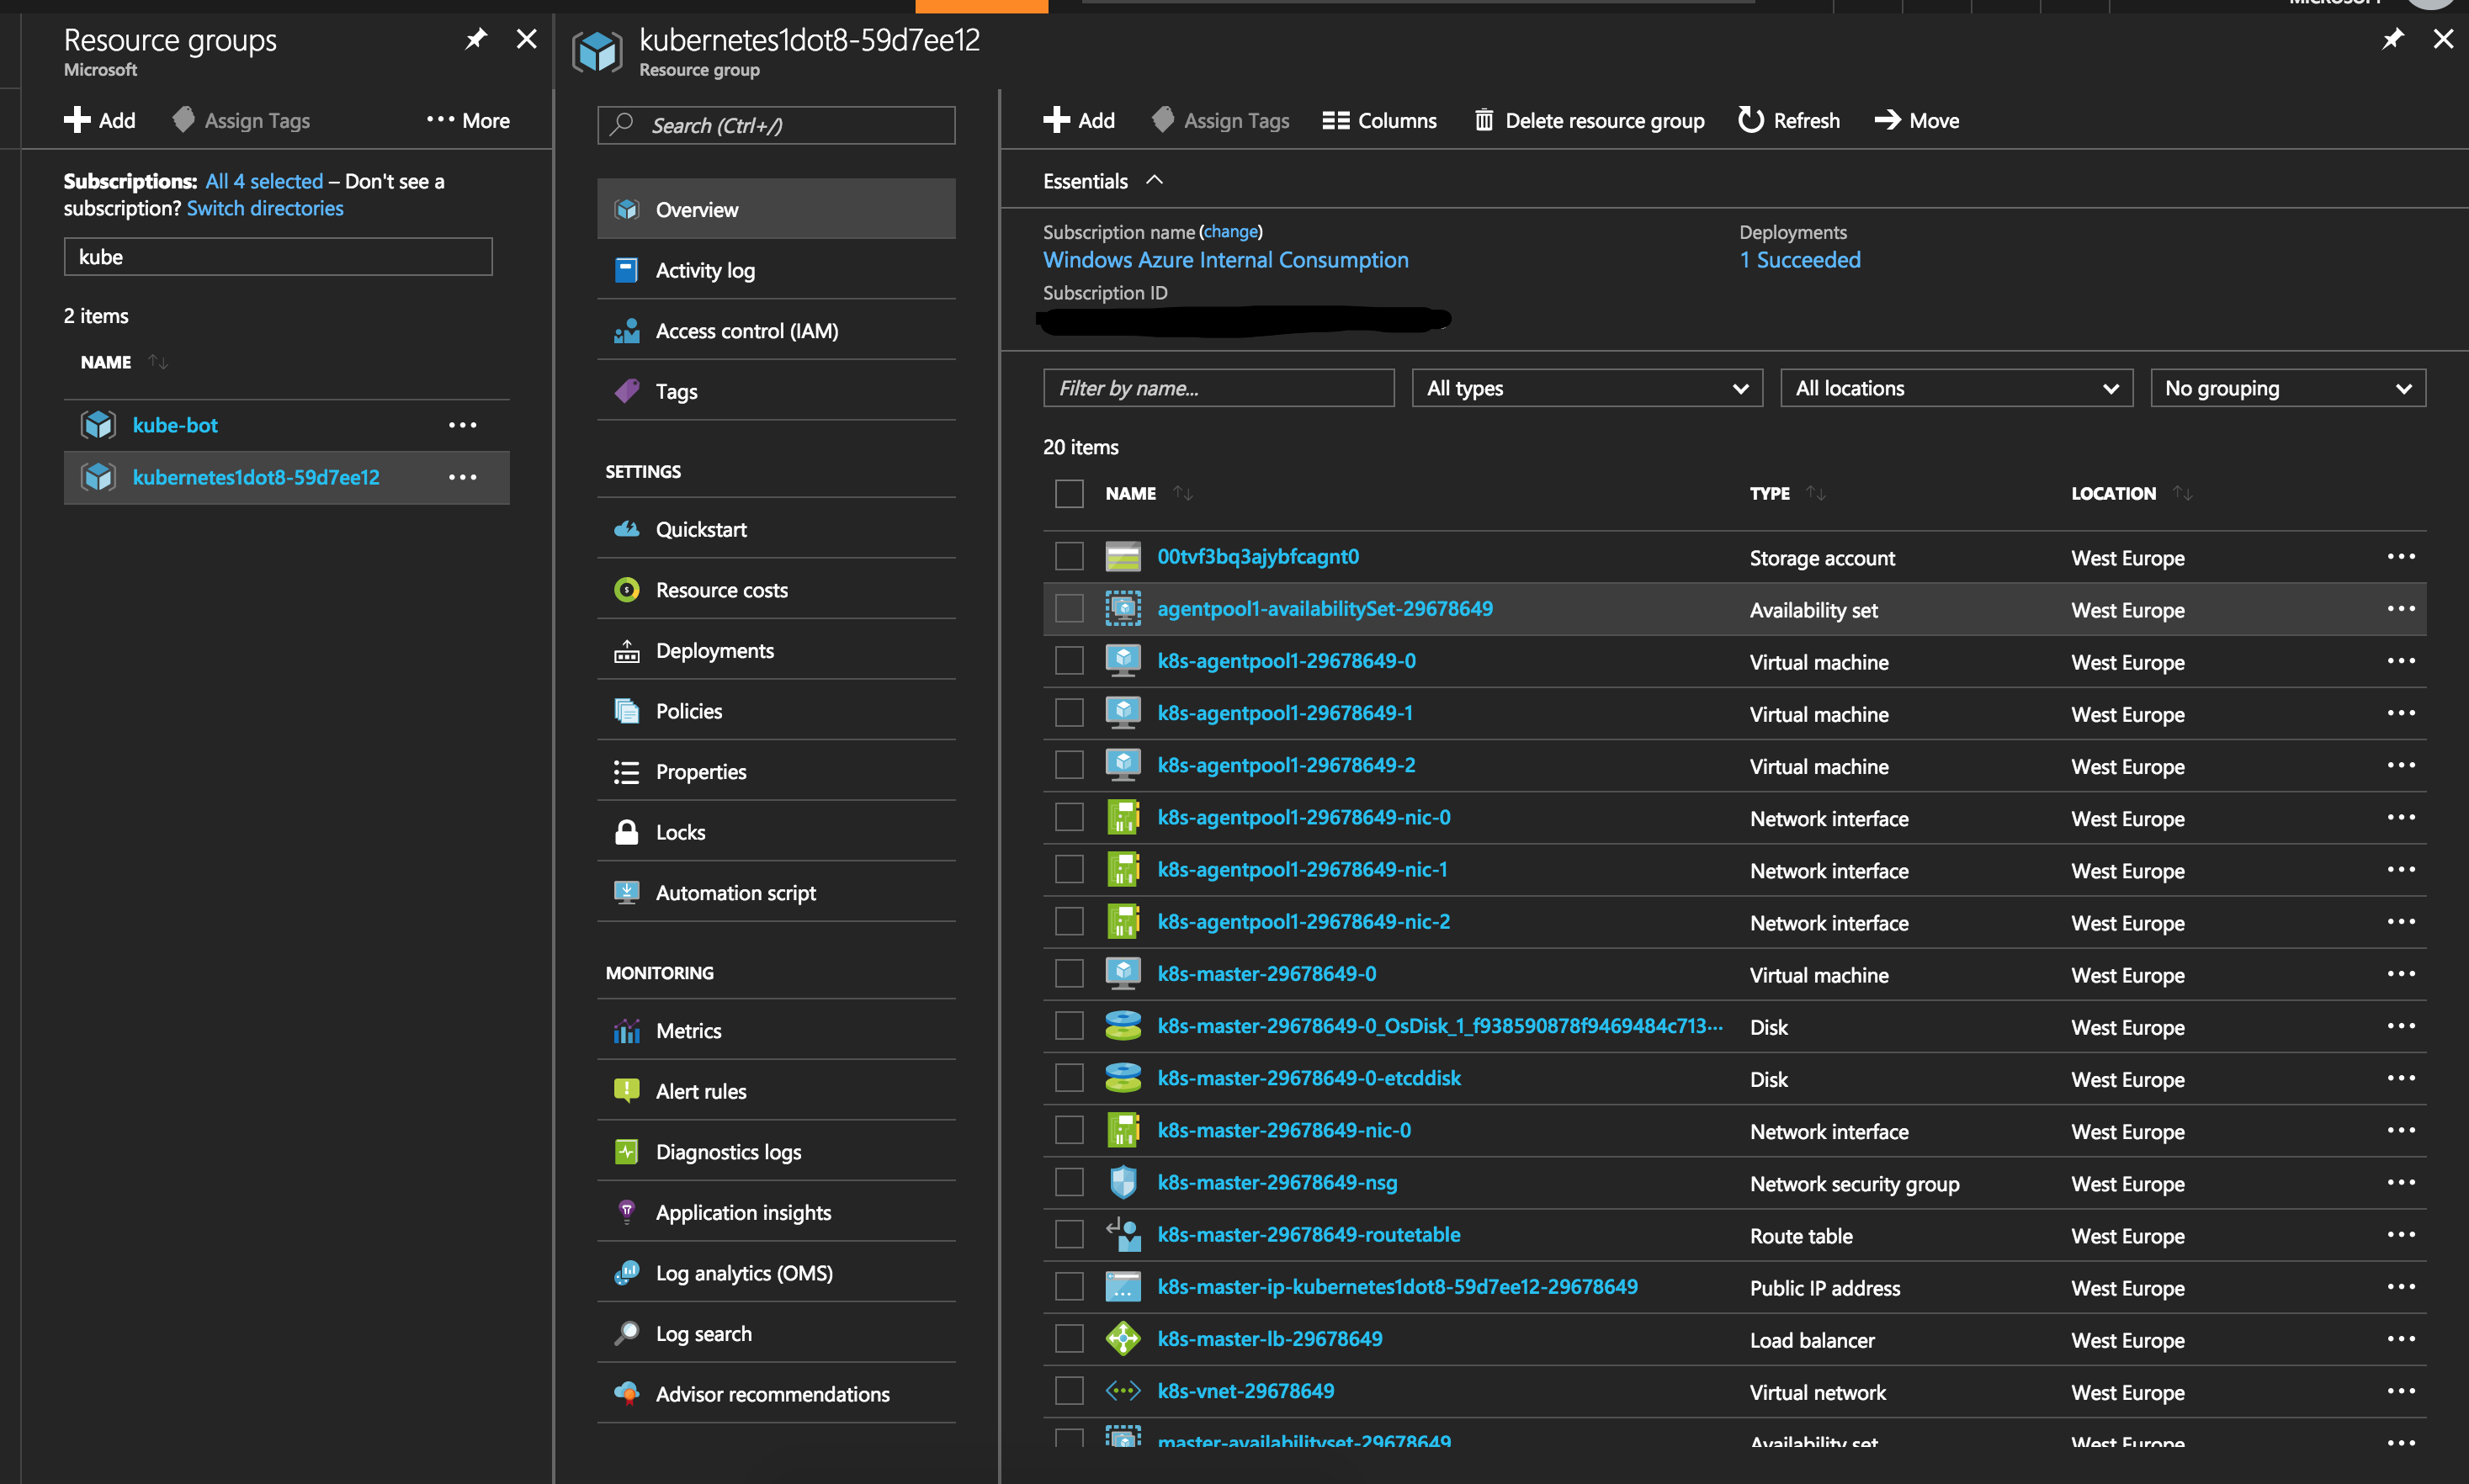
The output of the command above is an _output folder where you have your SSH keys and the kubeconfig to access the cluster.
Now to access the cluster.
Depending on which version of
kubectlyou have installed, you might want to upgrade to 1.8 as it is detailed here.
Now you need to point your kubectl to the kubeconfig file location. This has to correspond to the Azure location where you deployed your cluster - in my case West Europe:
export KUBECONFIG=_output/kubernetes1dot8-59d7ee12/kubeconfig/kubeconfig.westeurope.json
At this point you can use kubectl to get information about your cluster and your nodes:
kubectl get nodes
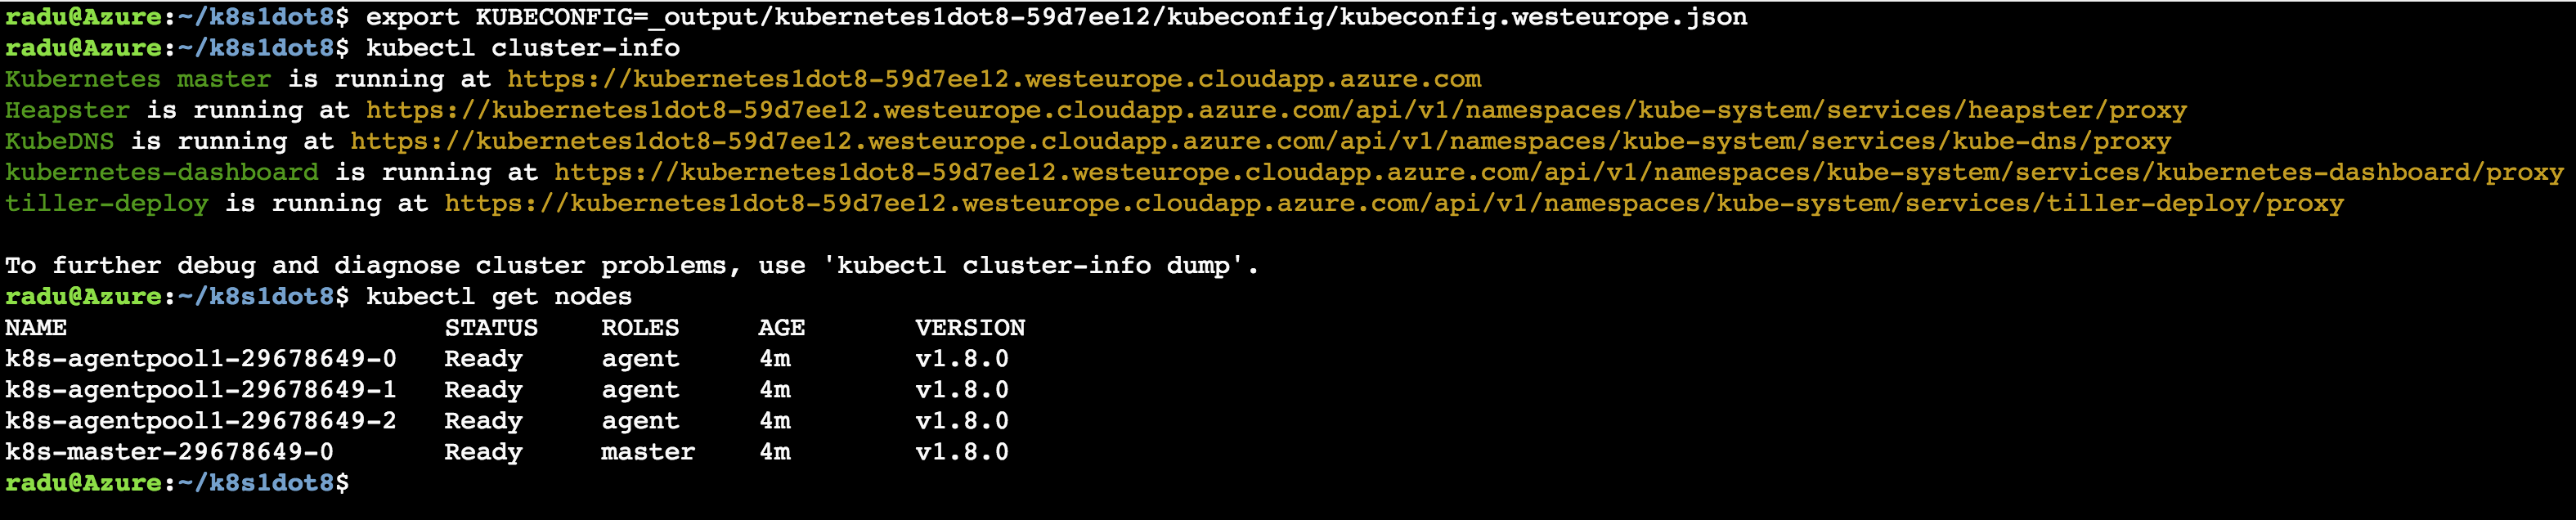
Note the
v1.8.0!
Now you have a Kubernetes 1.8 cluster where you can go ahead and use all the awesome features!
Configure kubectl from outside the Azure Cloud Shell
Since we deployed the cluster using the Azure Cloud Shell, all certificates and SSH keys are found in the _output directory from where you executed the acs-engine deploy command.
You will want to have access to your cluster from outside the browser (for obvious reasons), so you will have to download the certificates and keys.
After watching this video on Channel9 explaining Azure Cloud Shell, you simply need to put your files in /home/<your-username>/clouddrive. Then you will find them in the Azure Storage account (more specifically in the the File Share) associated with your Cloud Shell.
If you don’t want to manually download each file (and you don’t have to mount the share), simply make an archive of the entire folder download it.
Then, point your local kubectl to the kubeconfig.<azure-location>.json file and you have access to your cluster.
Note that you can also create new users for your cluster, assign them roles and just download the key and certificate for the user, as described in the Bitnami documentation.
Conclusion, feedback
In this brief article we saw how to deploy a Kubernetes 1.8 cluster on Azure using acs-engine and the Azure Cloud Shell.
If you have any ideas, comments or feedback, please use the comments below :)