Jenkins pipelines with Kubernetes
In previous articles we deployed a Kubernetes 1.8 cluster to Azure using acs-engine, then configured Helm and Draft to simplify testing applications.
In this article we will explore how to deploy Jenkins using Helm and how to configure Jenkins pipelines that build containers, push images to an image repository and update Kubernetes deployments.
To follow along with this article, you need a Kubernetes cluster (we will use Kubernetes v1.8.0, but the instructions were also tested with v1.7.0) with Helm installed and a terminal with kubectl and helm installed and configured.
My cluster is deployed into Azure, West Europe, but you can do the exact same steps using the Google Container Engine or your on-prem cluster (note that you will not be given public IP addresses as is the case with Azure or GKE).
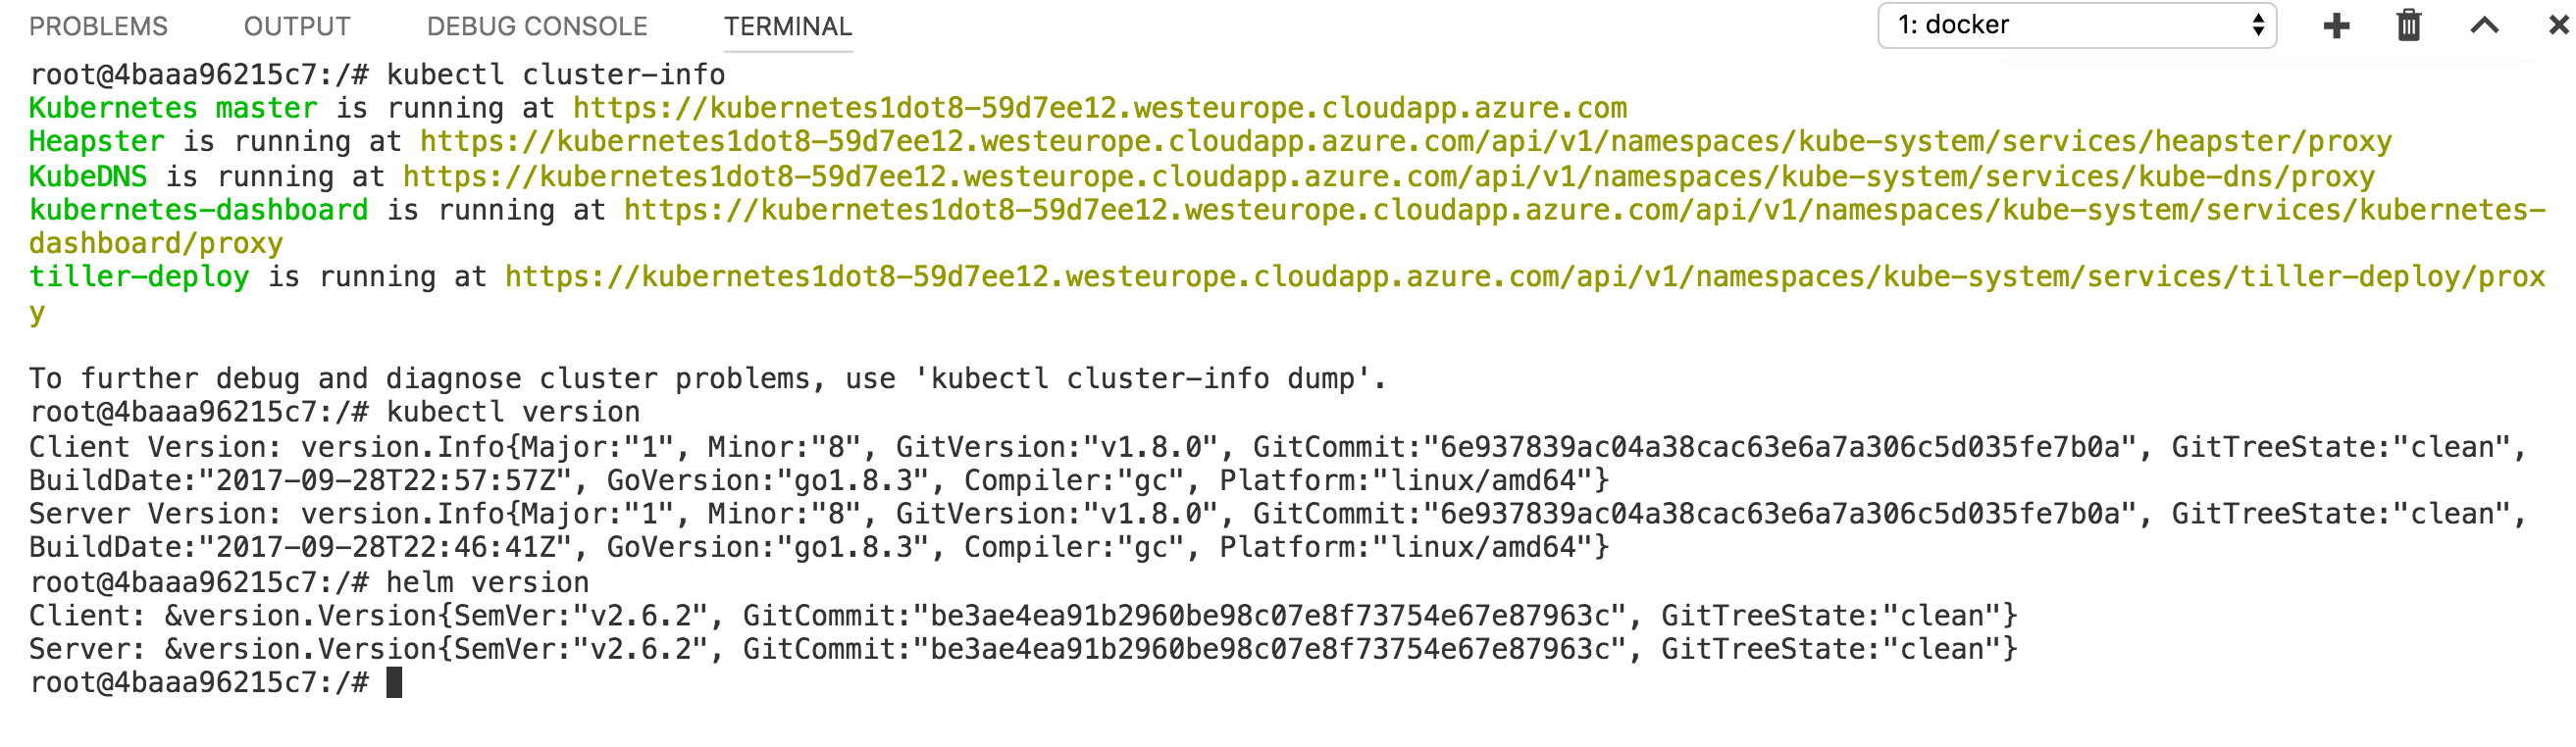
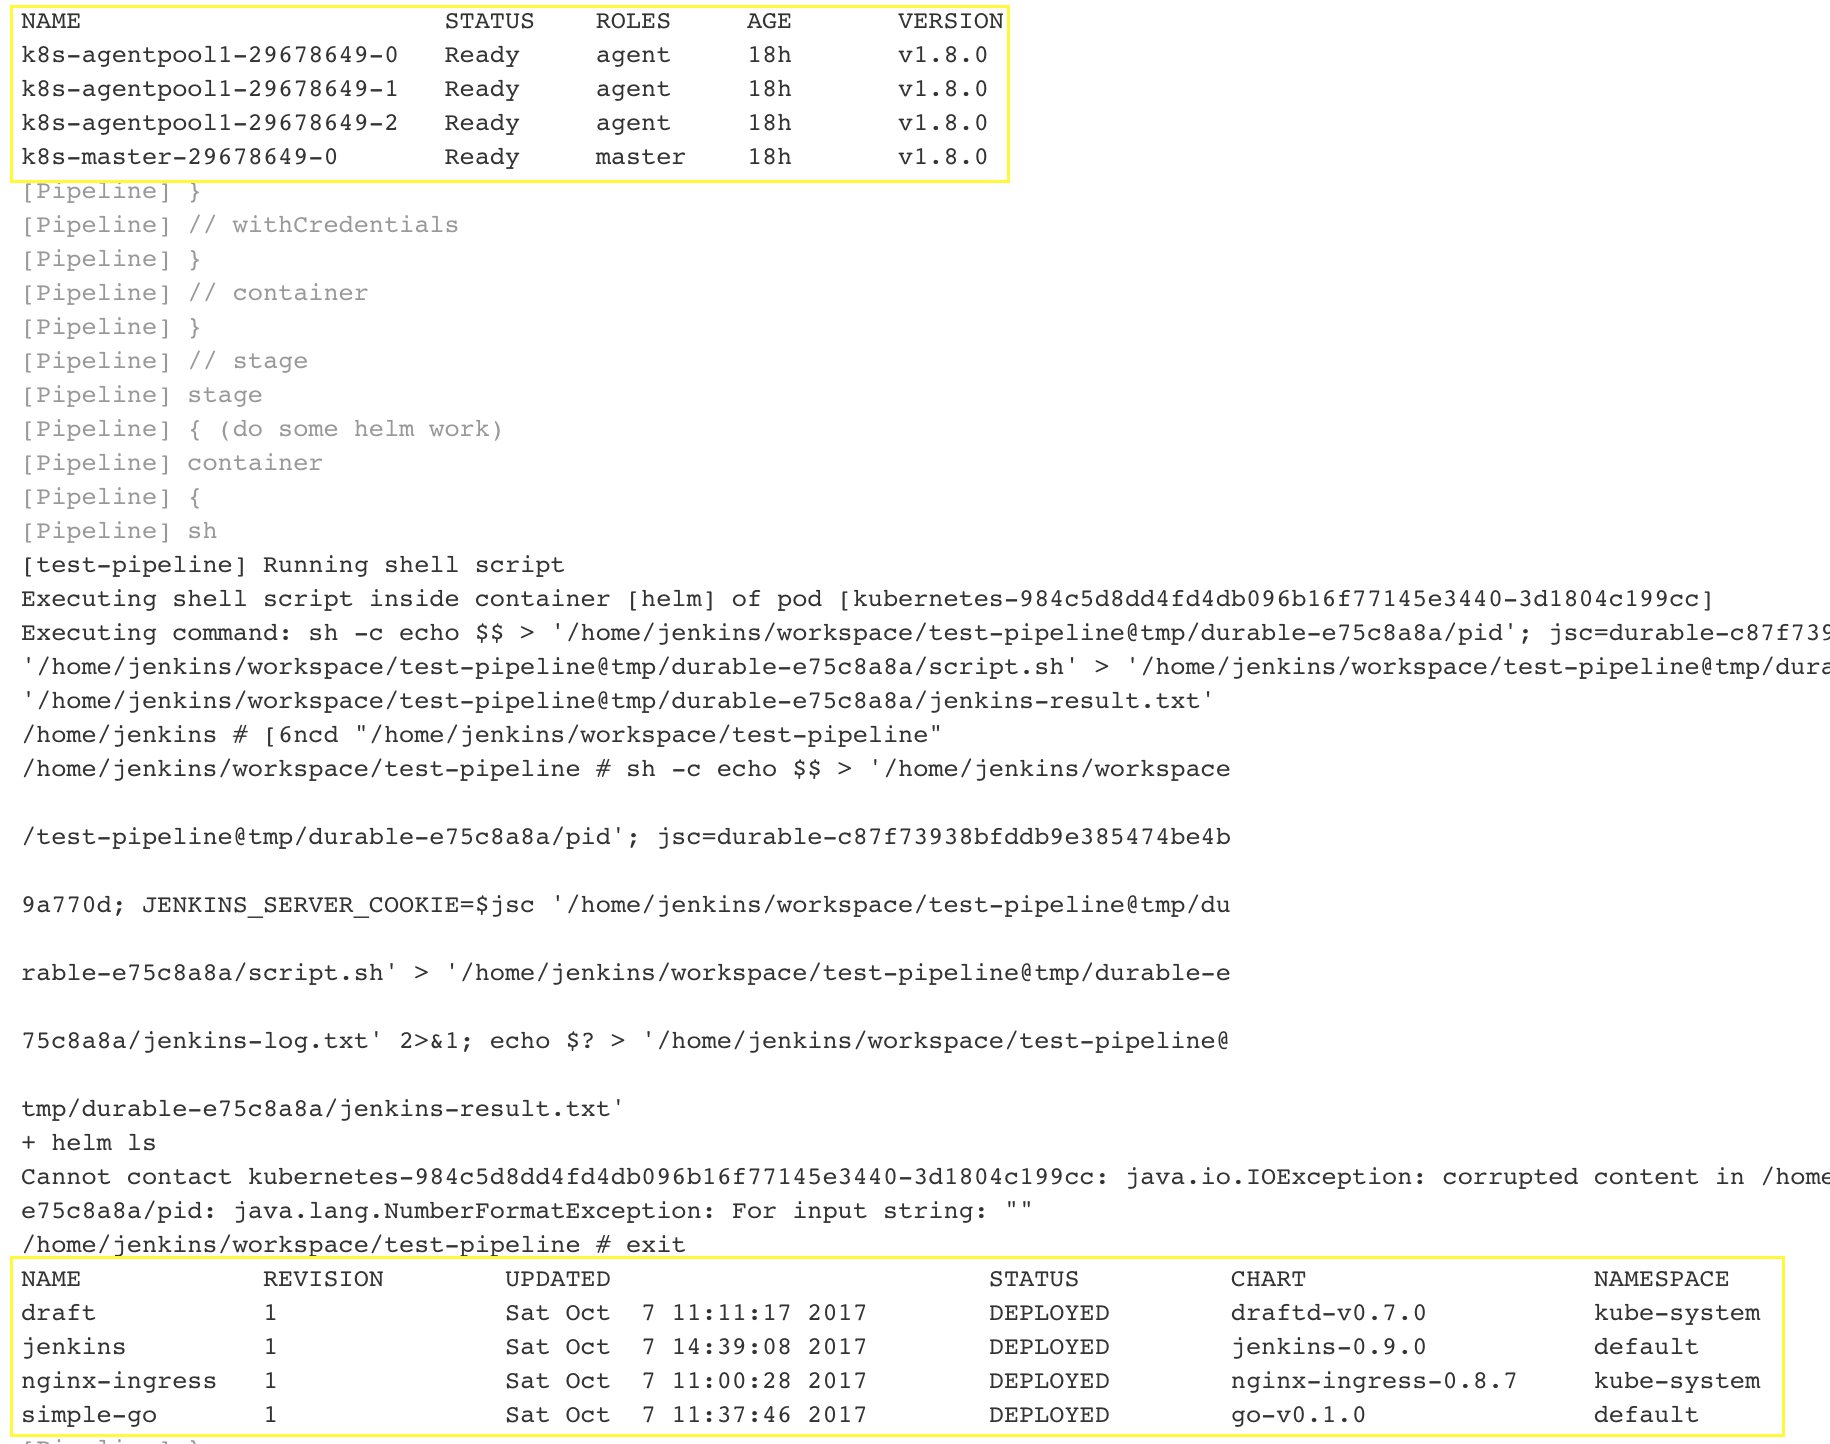
Now to check that everything is configured, verify your cluster information and versions. This is my starting point:
Deploying Jenkins with Helm
Using Helm you can easily deploy well-know applications (like Hadoop, Grafana, MongoDB, Redis) easily on your Kubernetes cluster using charts.
Charts are curated application definitions for Kubernetes Helm.
If we search for Jenkins in the list of stable charts, we find very clear instructions on how to deploy it.
A chart is composed of some templates (Kubernetes deployment files) and a file that holds our specific values for Jenkins - Docker image for master and agents, plugins to install, persistent volumes - basically all configurable values we can get for our Jenkins deployment.
This is the only file we will need to edit ourselves. Below you can find the one I use.
Here you can find all possible configuration for the values file, adjust it to your specific needs!
Note that this version mounts the /var/run/docker.sock socket inside the agent pods so we can built Docker images on our agents. There is a debate on wether you want to actually do that (basically you expose the Docker engine of the Kubernetes agent the pod is running inside), so do it at your own risk.
This also installs other plugins - such as Jenkins Blue Ocean.
The default values for Jenkins (that you can find in this repo) does not expose it, you can use that, but note that some features we will use later (basically
docker buildinside the worker pod) will not work.
Get this file locally, then execute:
helm install --name jenkins -f jenkins-values.yaml stable/jenkins
After you deploy the chart, you will get instructions on how to get the initial admin password:
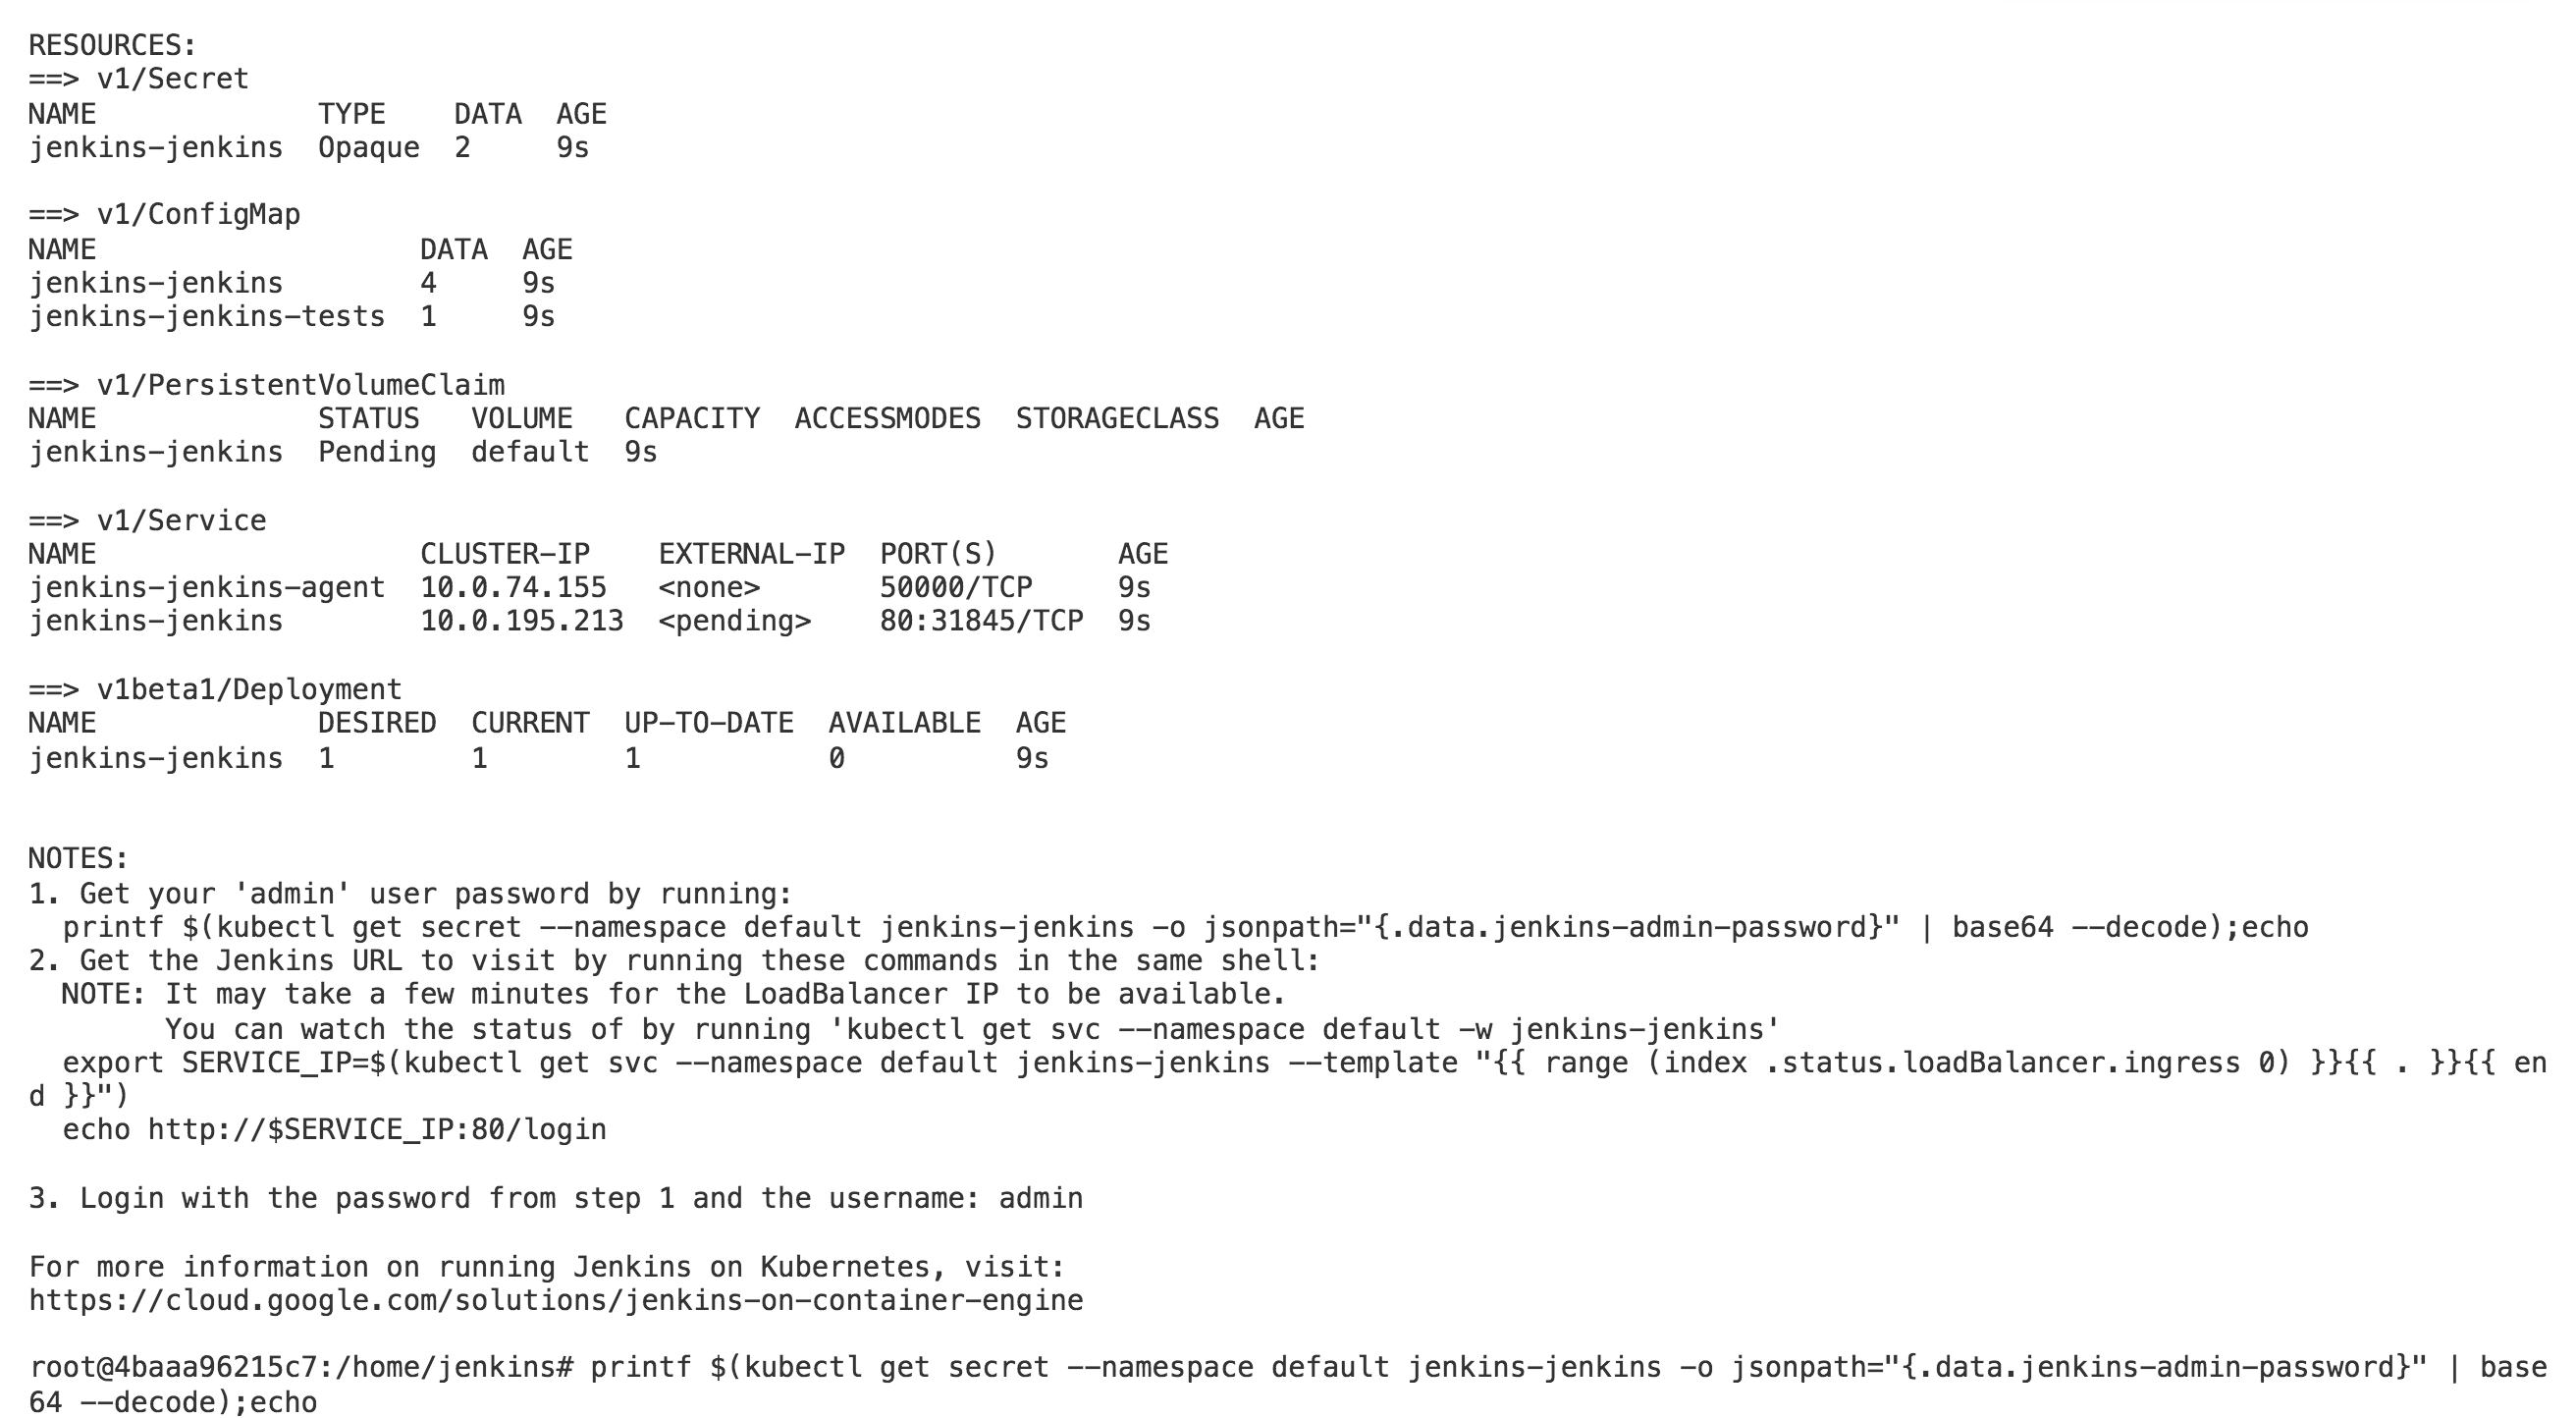
Note that the initial admin username is
adminand you should probably change it :)
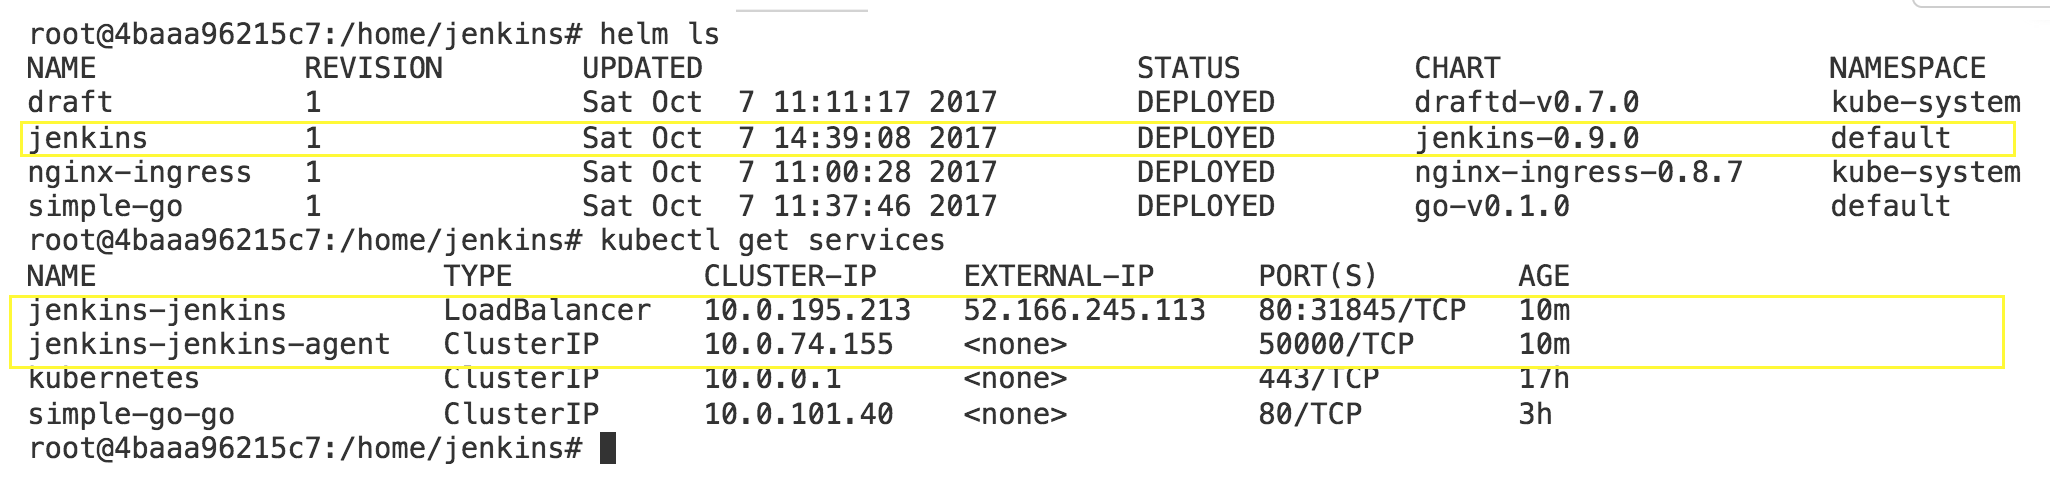
If you take a look at the state of your cluster, you can see that helm deployed jenkins, which resulted in two services in Kubernetes, one for the master and one for the agents.
Using the initial admin password (follow the instructions you had as output from Helm after deploying Jenkins), go to the public IP of your service and login.
You can find the command I used to get the initial admin password, but note that it will vary in your case based on the name you provided and the namespace where you deployed Jenkins.
printf $(kubectl get secret --namespace default jenkins-jenkins -o jsonpath="{.data.jenkins-admin-password}" | base64 --decode);echo
Now you have deployed an instance of Jenkins on your Kubernetes cluster using Helm, already configured with all plugins you specified in your jenkins-values.yaml file and with the ability to execute builds on your cluster.
Create credentials for your image repository
The goal is to have end to end automatic deployment to our Kubernetes cluster. This means we need to push images to an image repository (like Docker Hub, Azure Container Repository, Google Container Repository) as part of our Jenkins build.
Since all the repositories need some sort of authentication, we need to create a credential binding in Jenkins so that we don’t keep credentials in source control
Never, ever keep credentials in source control. Or connection strings, or any sort of sensitive information!
We can keep them as Kuberentes secrets, or as Jenkins secrets. In this case we will use Jenkins secrets, and we will reference them in our Jenkinsfile.
Now create new credentials in Jenkins:
Click the Credentials link in the sidebar
Click on the Global credentials domain
Click [Add Credential]
Full Cloudbees article that explains credentials and credential bindings in Jenkins
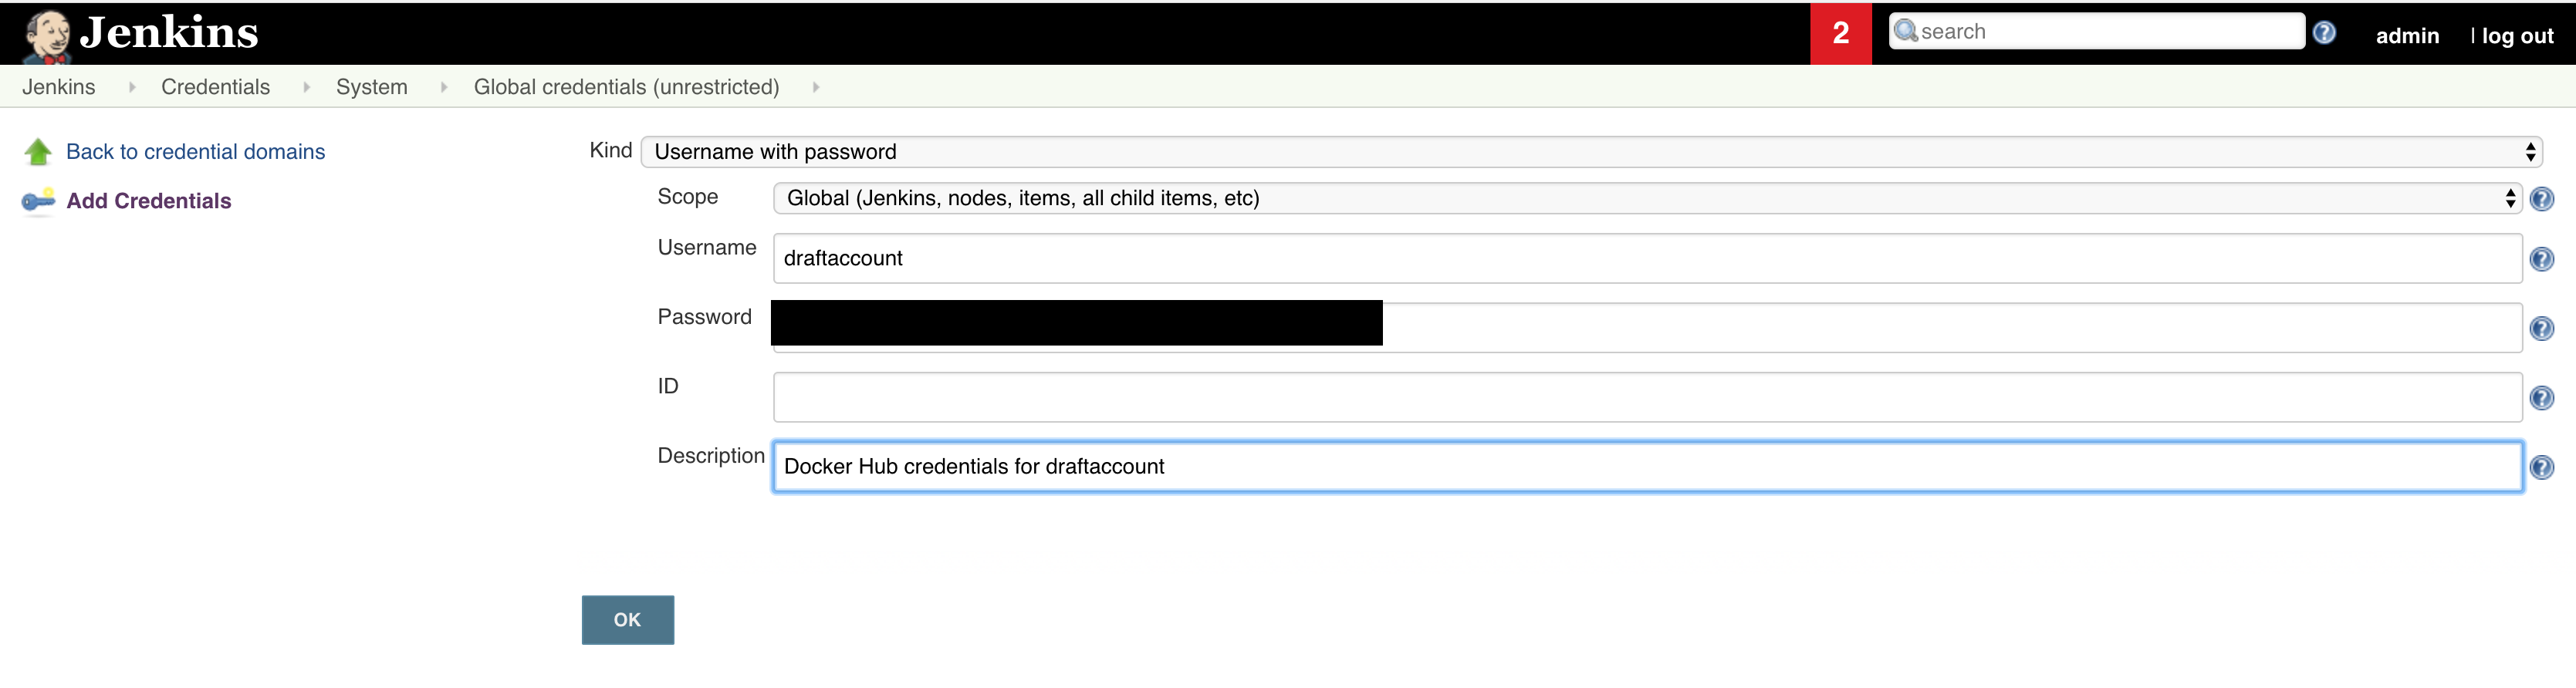
Now that you have the credentials in place (don’t forget to also add an intuitive ID for your credentials in the place I left blank!), you can create a new pipeline.
The Jenkinsfile
The initial goal was to create Jenkins pipelines that we can later store in source control. This pipeline describes our build process, and a usual process when we work with Kubernetes is to build a Docker image, push it to a image repository then to some work with kubectl (like update the image for a deployment), or with helm (update a chart, or deploy a new one).
We will now look at how to write the simplest Jenkinsfile that will to exactly that: build and push an image to a repo and do work with kubectl and helm.
Here you can read all about writing Jenkinsfiles with the Kubernetes plugin for Jenkins
Don’t forget to use your credential ID in the Jenkinsfile!
This Jenkinsfile makes use of having multiple containers in the same Kubernetes pod - we will have 3 containers - one based on a Docker image, one based on kubectl and the last based on helm.
You can create your own containers - in this case I used the official one for Docker and the images built by Lachie Evenson, since are widely used on Docker Hub and I kind of trust Lachie :)
Use images from the Internet at your own risk!
Note that we are mounting the Docker socket inside our pod so the Docker container has access to the Docker engine - this step is debatable for using in production (but it is arguably better than using Docker-in-Docker - read this article).
Since we are already running in the cluster, the other two containers are already authenticated.
You can test this Jenkinsfile by creating a simple Jenkins pipeline and pasting this Jenkinsfile directly there (ugly, but the easiest way to do it).
This is part of the output for the Jenkinsfile above. Please note that from within this container you have access to the real cluster! You might want to take a look at the new 1.8 RBAC features in Kubernetes, but keep in mind that with great power comes great responsibility!
Using the Jenkinsfile
Basically, now all you need to do is replace the dummy steps I wrote for each step and you have yourself a fully functional Jenkins pipeline!
Put it side by side with your code in the repository and take care of it just as you would with your source code!
Investigating what actually happens in the cluster
We see that the steps in our Jenkinsfile are executed, but let’s explore a bit where that really happens.
Whenever there’s a new build, the master will dynamically create agent pods based on your Jenkinsfile. There will always be a jnlp container there that knows how to connect to the master, among with whatever containers you specify.
Let’s see that pod in action:
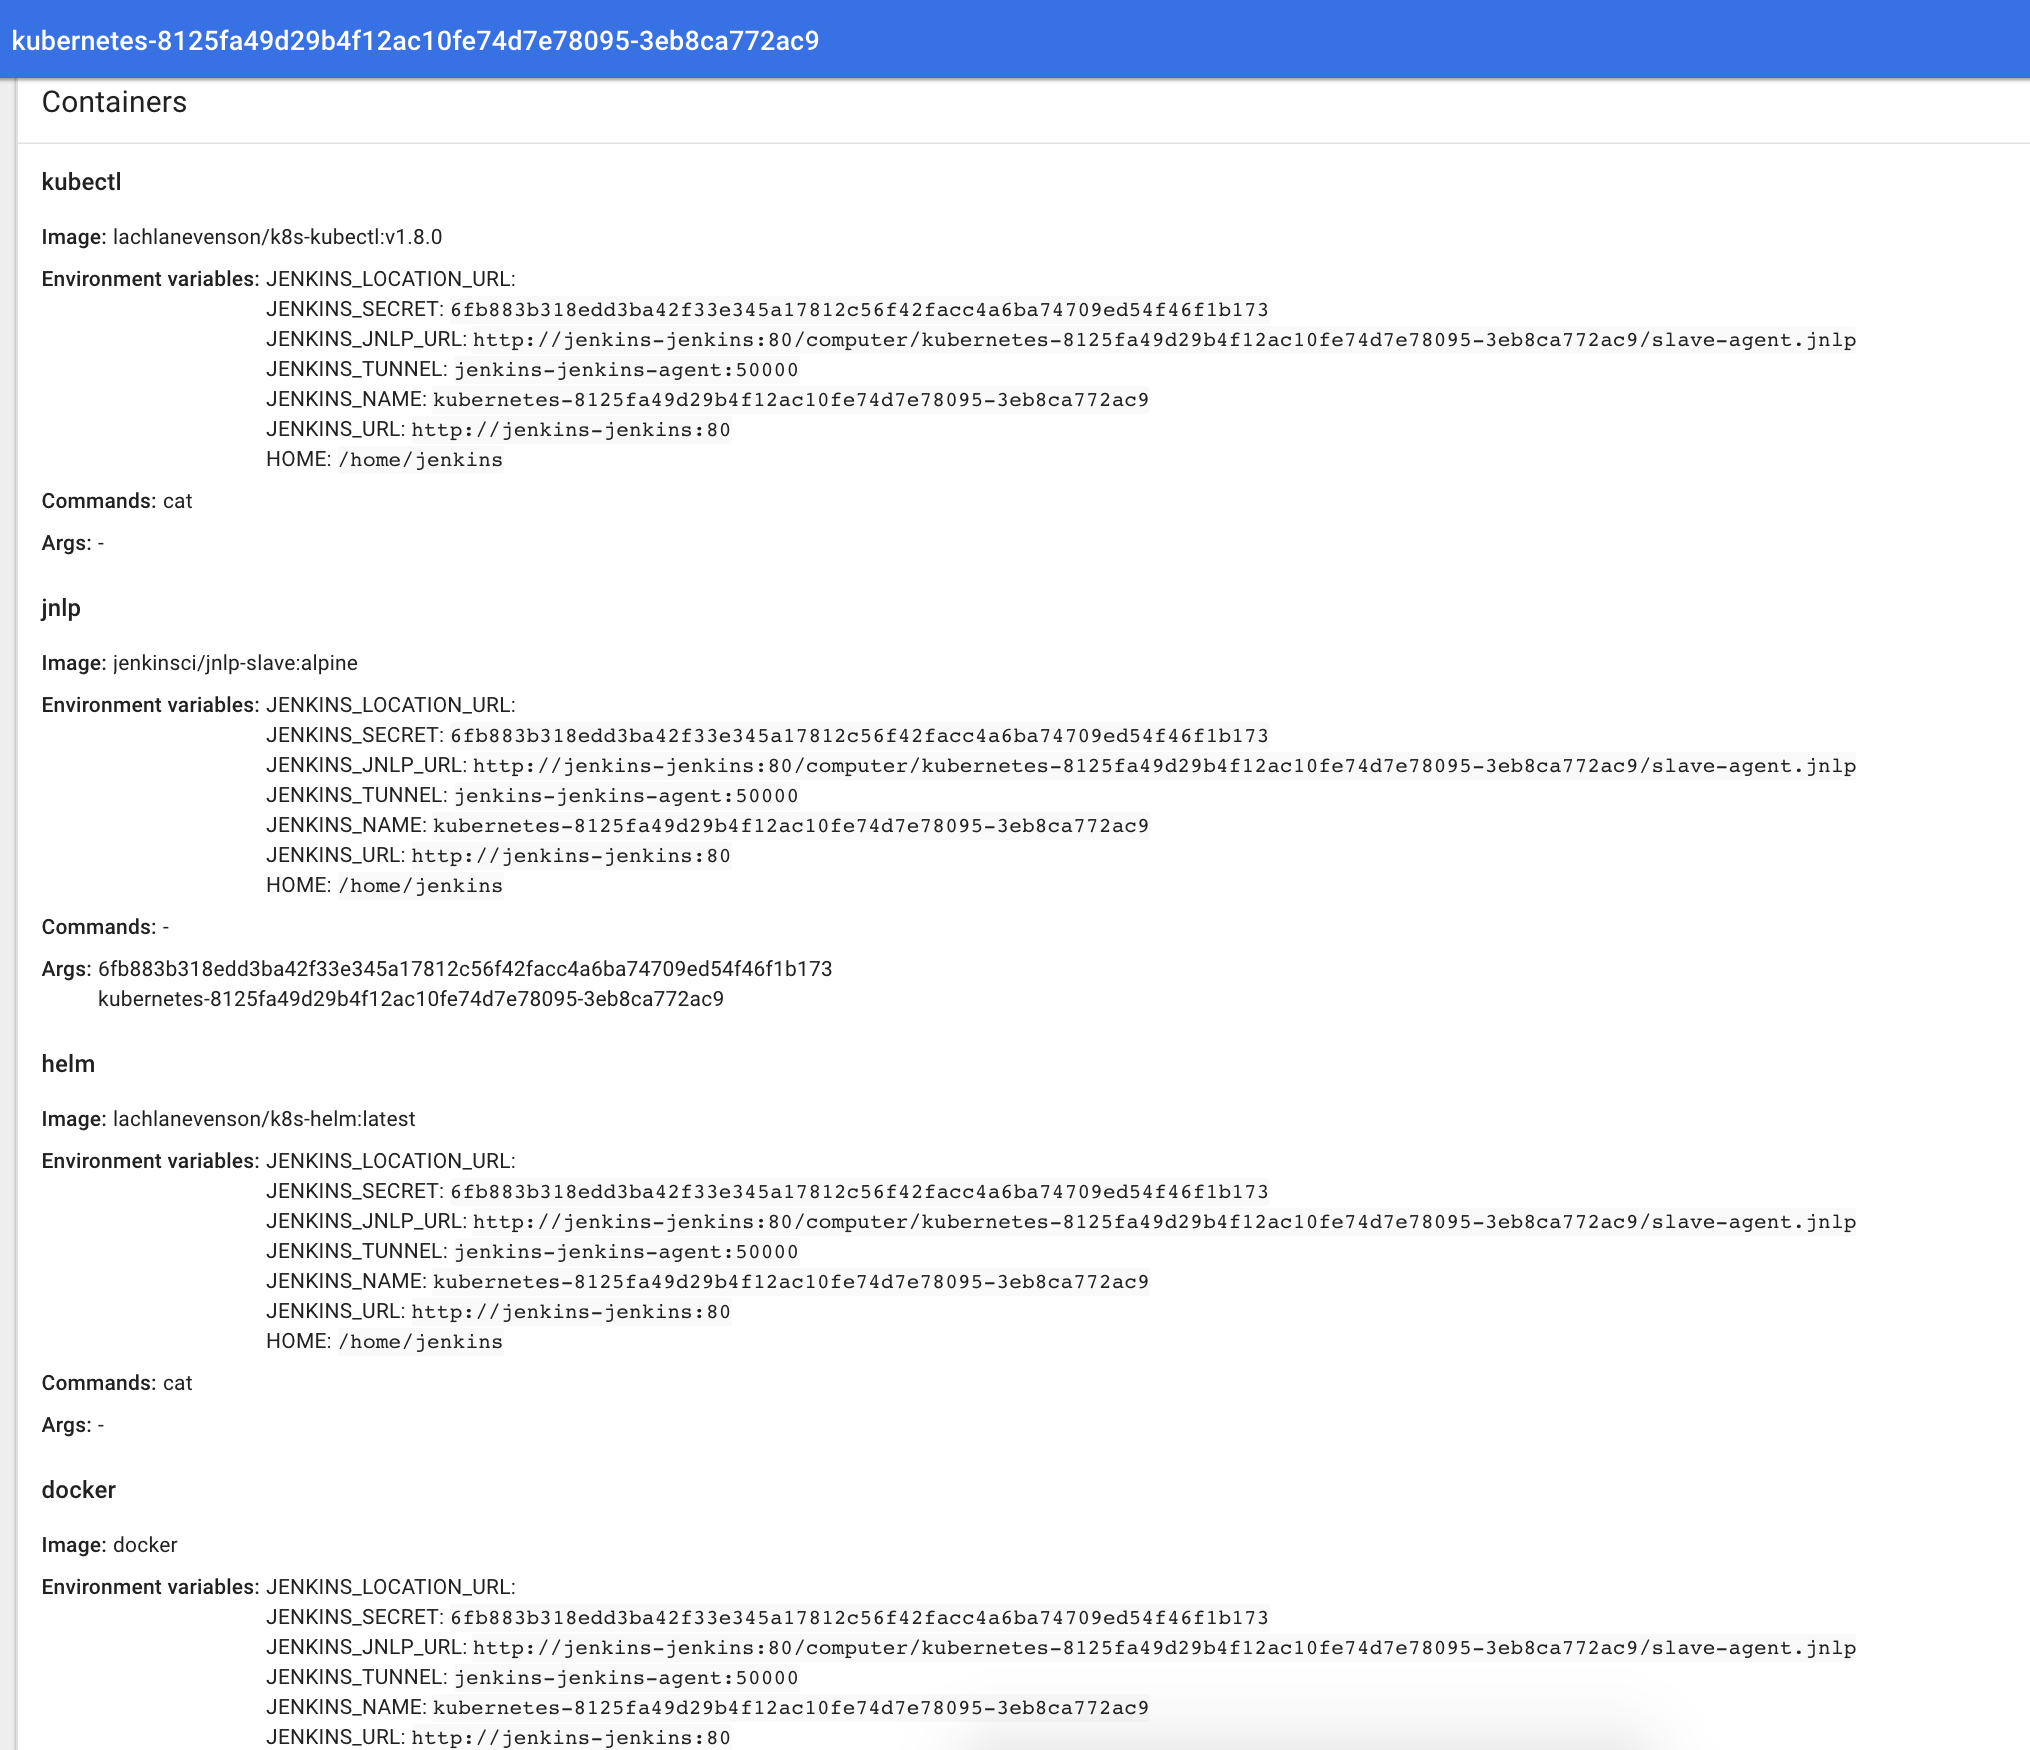
Here you can see all containers inside the pod (with their image, tag and environment variables).
The cool thing about this plugin is you only see resources being used (CPU + memory) when there’s a build in progress. Once that build is done, your resources are freed:
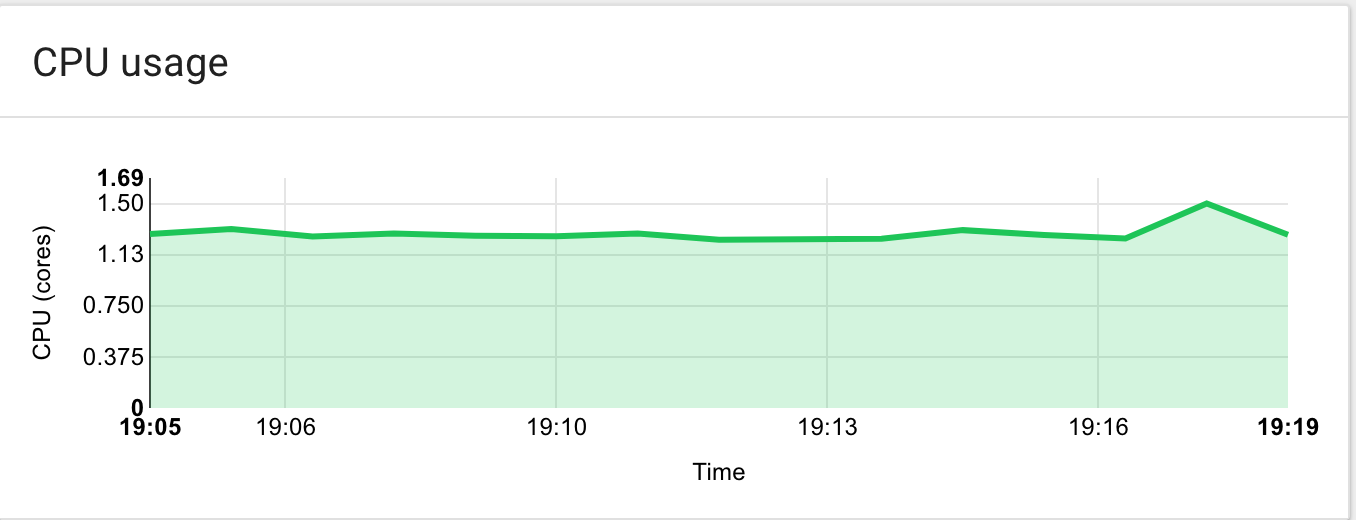
The short spike at the end corresponds to a build being executed
Conclusion
We deployed Jenkins on our Kubernetes cluster using Helm (in a reproducible way, you can deploy it again with the same plugins at any time - keep this in a source control as well), then saw how to configure credentials and write Jenkinsfiles pipelines.
If you have a better approach at any of the concepts presented in this article, or have any questions, please use the comments below. As always, thanks for reading, and any feedback is highly appreciated :)