Real-Time ASP .NET Core
NOTICE
What is this?
This is an ASP .NET Core middleware for providing real-time functionality to your applications. To its core, this is a WebSockets middleware for ASP .NET Core applications with TypeScript / JavaScript and .NET clients.
This is an open-source library available (for using and contributing) on GitHub.
Why wouldn’t I use SignalR for real-time?
Well, the reason is quite simple: SignalR for ASP .NET Core is still in its very incipient stages. A preview is expected mid-2017, while a release near the end of 2017, so most probably it will be available for ASP .NET Core 2.0.
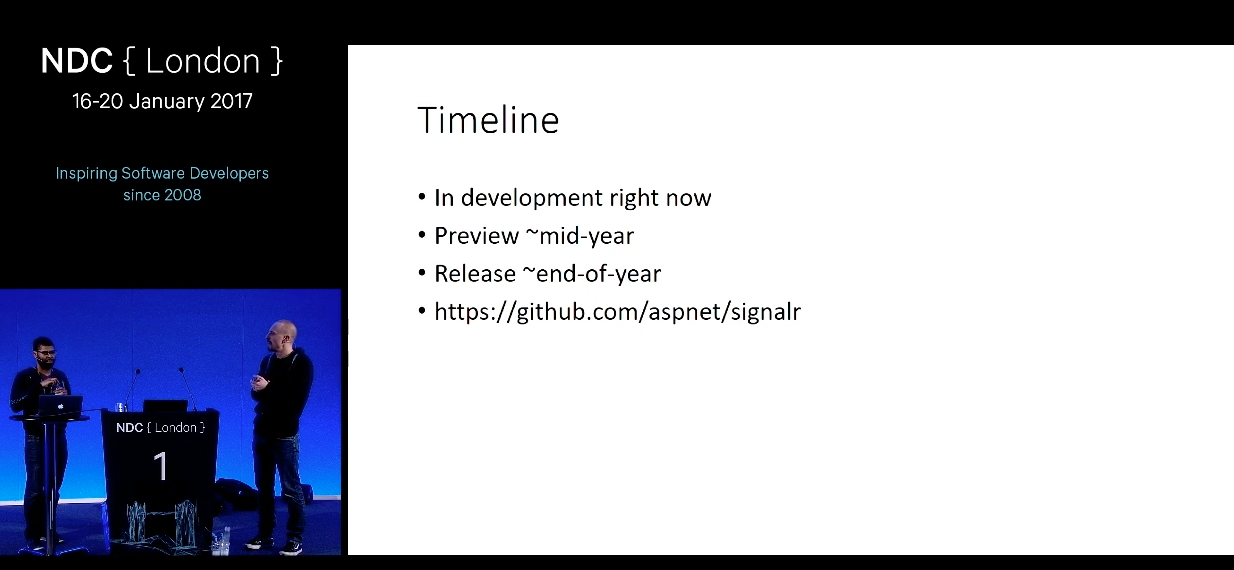
The preview and release information, as well as the photo above were taken from this talk by Damian Edwards and David Fowler, the guys in charge of ASP .NET Core and SignalR.
Basically, this offers a way to provide real-time functionality to your application right now if you don’t want to wait until mid-2017 for a SignalR preview.
At this moment, booting up a simple SignalR sample cannot be done under ASP .NET Core 1.1, the latest stable release of the framework.
So wait. Is this related to SignalR?
Simple answer: NO. This is not an official release from Microsoft and is not in any way related to the SignalR project which is developed on GitHub in this repository.
However, a lot of concepts were inspired from both the new and the old SignalR, so if you wrote SignalR in the past, a lot of the concepts will be familiar.
Because the release of SignalR for ASP .NET Core was delayed for so long, I decided to write a very basic, stripped down (compared to the original SignalR) that only supports WebSockets (is based on Microsoft.AspNetCore.WebSockets) with server support, TypeScript and C# clients.
This started as a fun side project (and I am pretty sure it will stay this way once SignalR becomes ready for production).
High-level overview
This library offers real-time functionality to ASP .NET Core applications, using WebSockets. It also supports the client and the server calling each others’ methods (mainly like in the good old SignalR).
In order to get real-time functionality in your application, you need to create a class (called Handler, which inherits WebSocketHandler), that is very similar to the Hub class in SignalR.
Then, in this Handler class you can create public methods that the (JavaScript and C#) clients can call, and can call client methods.
Another approach is for MVC applications, where you create the Handler class without any public methods, but as a proxy, and provide notifications to the clients from a controller (again, very much like in SignalR).
The library uses a fire-and-forget approach both on the client and the server, meaning that it tells the server / client what method to call and that’s it, it doesn’t track the execution of that method.
Next, we will use at how to add this library to an ASP .NET Core application.
Getting started with websocket-manager
The easiest way to get started is to first clone / fork the project from GitHub.
git clone https://github.com/radu-matei/websocket-manager
Then, in the samples directory, make a new directory and create a new .NET Core application using the dotnet new command. This will be our web application, and the reason we create it in the samples folder is because we will need to add a reference to the websocket-manager project (since the package is not yet on NuGet).
Create a new .NET Core application using the dotnet new command, then open the folder in VS Code. First of all, we need to update project.json to reference a few NuGet packages:
"Microsoft.AspNetCore.Server.Kestrel":"1.1.0"(the Kestrel web server that makes this a web application)"Microsoft.AspNetCore.StaticFiles":"1.1.0"(package that allows us to server static files)"Newtonsoft.Json":"9.0.1"(we will not explicitly use Newtonsoft.Json, but this is a bug in the tooling where I also need to reference a package that I use in the library in the project using the library. This should not be necessary in future tooling releases.)"WebSocketManager": { "target": "project" }- this is the reference to thewebsocket-managerproject in thesrcfolder
This is how project.json looks like:
{
  "version": "1.0.0-*",
  "buildOptions": {
    "debugType": "portable",
    "emitEntryPoint": true
  },
  "frameworks": {
    "netcoreapp1.1": {
      "dependencies": {
        "Microsoft.NETCore.App": {
          "type": "platform",
          "version": "1.1.0"
        },
        "WebSocketManager": {
          "target": "project"
        },
        "Microsoft.AspNetCore.Server.Kestrel": "1.1.0",
        "Microsoft.AspNetCore.StaticFiles": "1.1.0",
        "Newtonsoft.Json": "9.0.1"
      },
      "imports": "dnxcore50"
    }
  }
}
Then, we need to update our Program.cs to make this a web application, including our Startup class:
        public static void Main(string[] args)
        {
            var host = new WebHostBuilder()
                .UseKestrel()
                .UseContentRoot(Directory.GetCurrentDirectory())
                .UseStartup<Startup>()
                .Build();

            host.Run();
        }
So far this looks just like all ASP .NET Core applications showcased on this blog before, just the bare minimum parts necessary.
Now let’s add a Startup class.
First of all, in the ConfigureServices method we need to add the WebSocketManager service that is used across websocket-manager. This extension method adds WebSocketConnectionManager to the services, as well as all classes that inherit WebSocketHandler (more on this later).
In the Configure method, we need to use WebSockets and Static Files. (The full Startup class will be here soon).
Building a chat application
The all present example when talking about SignalR was a chat application, and I couldn’t think of a better example, so we will build an ASP .NET Core chat application, with a webpage and a console application that logs every message.
We will need to add a Handler class that will allow the clients to connect to our application. This class needs to inherit the WebSocketHandler class from the library.
Since this uses the ASP .NET Core built-in dependency injection, this class will have a constructor that passes all relevant components (in this case WebSocketManager - that we will not use directly).
This class will handle clients connecting and disconnecting, exposes public methods that clients directly call (invoke) and allows the invocation of client methods.
The library uses a Message class to pass messages between the server and clients, which contains a MessageType (most likely this will be a method invocation) and a Data field which can be used to hold any JSON-serialized object (since it is a string field). This is how we will pass log messages to the clients.
Connection and Disconnection events
        public override async Task OnConnected(WebSocket socket)
        {
            await base.OnConnected(socket);

            var socketId = WebSocketConnectionManager.GetId(socket);

            var message = new Message()
            {
                MessageType = MessageType.Text,
                Data = $"{socketId} is now connected"
            };

            await SendMessageToAllAsync(message);
        }
First of all, we need to call await base.OnConnected so that the framework registers the connection. Then, we can retrieve the ConnectionId from the WebSocketConnectionManager so that we can send all clients (by using SendMessageToAllAsync) a log about who connected.
The
SendMessageToAllAsyncmethod will be mainly used to pass logs to the clients and will most likely be refactored to emphasize this aspect. But for now, you might want to send plain text messages to clients, rather than method invocations.
The
InvokeClientMethodAsyncmethod also uses theSendMessageAsyncmethod, passing a serializedInvocationDescriptorfor theDatafield.
In a similar manner we treat the disconnection event:
        public override async Task OnDisconnected(WebSocket socket)
        {
            var socketId = WebSocketConnectionManager.GetId(socket);

            await base.OnDisconnected(socket);

            var message = new Message()
            {
                MessageType = MessageType.Text,
                Data = $"{socketId} disconnected"
            };
            await SendMessageToAllAsync(message);
        }
The only notable difference here is that we retrieve the connection id before calling
base.OnDisconnected, since this method removes the connection id from the framework.
Creating server methods and invoking client methods
All public methods in a Handler class can be invoked by connected clients.
public async Task SendMessage(string socketId, string message)
{
    await InvokeClientMethodToAllAsync("receiveMessage", socketId, message);
}
This is how such a method would look like. When a client calls the SendMessage method on the server, the server will tell all connected clients to invoke the receiveMessage method, with socketId and message as parameters.
The full ChatHandler class
    public class ChatHandler : WebSocketHandler
    {
        public ChatHandler(WebSocketConnectionManager webSocketConnectionManager)
                                                    : base(webSocketConnectionManager)
        {
        }

        public override async Task OnConnected(WebSocket socket)
        {
            await base.OnConnected(socket);

            var socketId = WebSocketConnectionManager.GetId(socket);

            var message = new Message()
            {
                MessageType = MessageType.Text,
                Data = $"{socketId} is now connected"
            };

            await SendMessageToAllAsync(message);
        }

        public async Task SendMessage(string socketId, string message)
        {
            await InvokeClientMethodToAllAsync("receiveMessage", socketId, message);
        }

        public override async Task OnDisconnected(WebSocket socket)
        {
            var socketId = WebSocketConnectionManager.GetId(socket);

            await base.OnDisconnected(socket);

            var message = new Message()
            {
                MessageType = MessageType.Text,
                Data = $"{socketId} disconnected"
            };
            await SendMessageToAllAsync(message);
        }
    }
Plugging the handler in Startup
We created a Handler class, but we need to register it in Startup and map clients connecting to a specific path to this ChatHandler class, since we can have multiple handlers in the same application.
In the Configure method inside Startup, we need to map all clients connecting to a path in our application (in this case “/chat”) to be handled by a Handler class, in this case ChatHandler (given by the service provider).
app.MapWebSocketManager("/chat", serviceProvider.GetService<ChatHandler>());
This is the full Configure method in Startup:
        public void Configure(IApplicationBuilder app, IServiceProvider serviceProvider)
        {
            app.UseWebSockets();
            app.MapWebSocketManager("/chat", serviceProvider.GetService<ChatHandler>());

            app.UseStaticFiles();
        }
This is pretty much it on the server side. Next, we will create web and .NET clients.
Creating the web client
So far we created the server part of our chat application. Now let’s look at creating the JavaScript part for connecting to our application.
First, we need to create a wwwroot folder in the root of our web application, and in there create a new HTML file.
You can take a look at the TypeScript client on GitHub.
In an HTML page we will use the JavaScript transpiled version of the TypeScript client. To use, simply include this script in your page that was generated by WebPack.
After including the WebSocketManager script in your page, in order to create a new connection write:
var connection = new WebSocketManager.Connection("ws://localhost:5000/chat");
Then, create client methods that the server can invoke:
            connection.clientMethods["receiveMessage"] = (socketId, message) => {
                var messageText = socketId + " said: " + message;

                console.log(messageText);
                // do something with the message
            };
Then, simply start the connection:
connection.start();
And this is pretty much it. You can configure logging and have custom functionality for connection and disconnection events, but all those are optional.
The following page has a text input area, a button and a message list - a very basic chat page.
Note the optional connection and disconnection methods.
<!DOCTYPE html>
<html>

<head>
	<meta charset="utf-8" />
	<title>Test Page</title>
</head>

<body>
	<h1>This should be mapped to "/chat"</h1>
	<input type=text id="textInput" placeholder="Enter your text" />
	<button id="sendButton">Send</button>

	<ul id="messages"></ul>


	<script data-main="scripts/main" src="https://rawgit.com/radu-matei/websocket-manager/master/src/WebSocketManager.Client.TS/dist/WebSocketManager.js"></script>

	<script language="javascript" type="text/javascript">

            var connection = new WebSocketManager.Connection("ws://localhost:5000/chat");
            connection.enableLogging = true;

            connection.connectionMethods.onConnected = () => {
                //optional
                console.log("You are now connected! Connection ID: " + connection.connectionId);
            }

            connection.connectionMethods.onDisconnected = () => {
                //optional
                console.log("Disconnected!");
            }

            connection.clientMethods["receiveMessage"] = (socketId, message) => {
                var messageText = socketId + " said: " + message;

                console.log(messageText);
                appendItem(list, messageText);
            };

            connection.start();

            var list = document.getElementById("messages");
            var button = document.getElementById("sendButton");
            button.addEventListener("click", function() {

                var input = document.getElementById("textInput");
                connection.invoke("SendMessage", connection.connectionId, input.value);

                input.value = "";
            });

            function appendItem(list, message) {
                var item = document.createElement("li");
                item.appendChild(document.createTextNode(message));
                list.appendChild(item);
             }
    </script>
</body>

</html>
This is pretty much the entire chat application. You can find it on GitHub, as the ChatApplication sample in the repo.
So does this really work?
Simply start the ASP .NET Core web application and navigate to http://localhost:5000/client.html (if you run directly the sample in the GitHub repository).
Then, start another tab with the same page and check it out:
The .NET Client
As I said earlier, there is also a C# client. Simply start a new .NET Core console application, reference the WebsocketManager.Client project from the repository and start a new connection. First, let’s look at project.json:
The C# client is available on GitHub, under the samples folder.
{
  "version": "1.0.0-*",
  "buildOptions": {
    "debugType": "portable",
    "emitEntryPoint": true
  },
  "dependencies": {},
  "frameworks": {
    "netcoreapp1.1": {
      "dependencies": {
        "Microsoft.NETCore.App": {
          "type": "platform",
          "version": "1.1.0"
        },
        "WebSocketManager.Client": {
          "target": "project"
        },
        "WebSocketManager.Common": {
          "target": "project"
        }
      },
      "imports": "dnxcore50"
    }
  }
}
Note that I also had to include the
Commonproject - the same bug that made me includeNewtonsoft.Jsonin the web application - hopefully with the new tooling of .NET Core this will not be necessary.
Then, the program itself is rather simple:
public class Program
{
    private static Connection _connection;
    public static void Main(string[] args)
    {
        StartConnectionAsync();

        _connection.On("receiveMessage", (arguments) =>
        {
            Console.WriteLine($"{arguments[0]} said: {arguments[1]}");
        });

        Console.ReadLine();
        StopConnectionAsync();
    }

    public static async Task StartConnectionAsync()
    {
        _connection = new Connection();
        await _connection.StartConnectionAsync("ws://localhost:5000/chat");
    }

    public static async Task StopConnectionAsync()
    {
        await _connection.StopConnectionAsync();
    }
}
While keeping the web application running, start this console application as well and the behavior should be similar to:
Integrating this in an MVC application
Most applications are not chat applications. And in most ASP .NET Core applications MVC is used. This library can also be integrated with MVC, so you can have most of the traffic going through MVC and only the notifications going through WebSocketManager.
Since the client will not invoke Handler methods directly, the Handler class only contains the constructor:
    public class NotificationsMessageHandler : WebSocketHandler
    {
        public NotificationsMessageHandler(WebSocketConnectionManage webSocketConnectionManager)
                        : base(webSocketConnectionManager)
        {
        }
    }
Then, in the MVC Controller simply have a property of the Handler type and use it to invoke client methods inside controller methods:
    public class MessagesController : Controller
    {
        private NotificationsMessageHandler _notificationsMessageHandler { get; set; }

        public MessagesController(NotificationsMessageHandler notificationsMessageHandler)
        {
            _notificationsMessageHandler = notificationsMessageHandler;
        }

        [HttpGet]
        public async Task SendMessage([FromQueryAttribute]string message)
        {
           await _notificationsMessageHandler.InvokeClientMethodToAllAsync("receiveMessage", message);
        }
    }
And this is pretty much it!
Conclusion
As I stated many times so far, this started as a fun side project and will probably remain so. The new SignalR will bring awesome new features and I will surely enjoy working with it.
But until it is ready to play with, this brings an alternative to bringing real-time functionality to your ASP .NET Core applications.
Contributing to this project
Feedback wanted
If you stumbled upon this article, please take a moment and provide some feedback both on the library itself and on the way the article is written. Any feedback is immensely appreciated, as well as questions and observations.